The Problem
I have been using FreeNAS / TrueNAS for over a decade. In the past year I moved my home server from CORE (FreeBSD based) to SCALE (Linux based) and have been very happy. I moved my backup server from 24.4 to 24.10 and ran into an interesting issue. I did not do an upgrade in place, I did a fresh installation. During the first boot after the installation from USB the system hung with an error that it could not mount the boot-pool and dropped me into an Ubuntu initramfs recovery shell.
Troubleshooting this, I manually tried importing the boot-pool zpool with the following command: /sbin/zpool import The result was that no zpools could be found. Strange, since the installer had just created it. I then tried /sbin/zpool import -d /dev which told zpool to look through the devices found in /dev for the zpools. This found the boot-pool. At this point I imported the boot-pool with /sbin/zpool import -d /dev boot-pool. This imported the zpool fine. /sbin/zpool list and /sbin/zpool status showed a healthy zpool as expected. I then exited from the initramfs shell and the boot process continued.
I proceeded to configure the remainder of the disks into the zpools I desired, a 4 x 4TB HDD RAIDz zpool for backup storage and a 2 x 500GB SSD mirror for Apps. I then proceeded to reboot the server. Yes, I was expecting the reboot to fail the same way it did previously, and it did not disappoint. But this gave me some data points for troubleshooting. After it dumped me into the initramfs shell I ran the /sbin/zpool import and it found the backup zpool and the Apps zpool, but not the boot-pool.


Why is it not finding the boot-pool? I tried a /sbin/zpool import -d /dev and it found all three zpools.


I imported the boot-pool, exited the initramfs shell and booting continued (as expected at this point).
Troubleshooting and Repair
At this point I really wanted to know what was going wrong. What was different between the boot-pool, Apps, and KH_backup zpools? I started looking at the various device / partitions with sudo /sbin/zdb -l to examine the zfs labels. zfs writes 4 redundant disk labels on each piece of device in use (it can be global or in a partition), 2 at the start of the block and 2 at the end. The boot-pool was on the sda and sdd drives in partition 3.
sudo /sbin/zpool zdb -l /dev/sdashowed a corrupt label at position 2 and 3 and no labels at positions 0 and 1.sudo /sbin/zpool zdb -l /dev/sda1andsudo /sbin/zpool zdb -l /dev/sda2showed no labels.sudo /sbin/zpool zdb -l /dev/sda3showed valid labels at all 4 positions.- The corrupt label on
sdais not correct.
I used the browser user interface to replace sda with sdb. Once that completed I used the browser user interface to wipe sda. sudo /sbin/zdb -l /dev/sda then found no labels and there were no partitions.
I used the browser user interface to replace sdb with sda. Once that completed I used zdb to examine the labels.
sudo /sbin/zdb -l /dev/sdashowed no labelssudo /sbin/zdb -l /dev/sda1showed no labelssudo /sbin/zdb -l /dev/sda2showed no labelssudo /sbin/zdb -l /dev/sda3showed 4 valid labels, as it should.
sda now looks good, time to do the same to sdd (my other boot device).
I used the browser user interface to replace sdd with sdb. Once that completed I used the browser user interface to wipe sdd. sudo /sbin/zdb -l /dev/sdd then found no labels and there were no partitions.
I used the browser user interface to replace sdb with sdd. Once that completed I used zdb to examine the labels.
sudo /sbin/zdb -l /dev/sdd showed no labelssudo /sbin/zdb -l /dev/sdd1showed no labelssudo /sbin/zdb -l /dev/sdd2showed no labelssudo /sbin/zdb -l /dev/sdd3showed 4 valid labels, as it should.
Both of my boot devices look good, so I reboot the system. It came up fine with no errors or missing zpools. This process fixed the problem without having to resort to manually manipulating data on the devices and reinstalling.
The Repair Process
This process assumes you have just completed the TrueNAS installation and the first boot has hung at an initramfs shell with an error that it cannot import the boot-pool. It also assumes that you have at least one additional, unused disk/device that is not part of your boot-pool that is at least as large as your boot-pool device(s) and that you can temporarily use while fixing the boot-pool device(s).
For this process:
boot-poolis a 2-way mirror- This process will work if the
boot-poolis not mirrored, just skip the steps for the 2ndboot-pooldevice
- This process will work if the
boot-pooldevice 0 issdaboot-pooldevice 1 issdb- Unused disk/device is
sdc
- (initramfs)
sudo /sbin/zpool import -d /devand confirm that it found theboot-pool, if it did not find theboot-poolthen stop, this process will not work. - In the browser user interface (BUI) navigate to System -> Boot
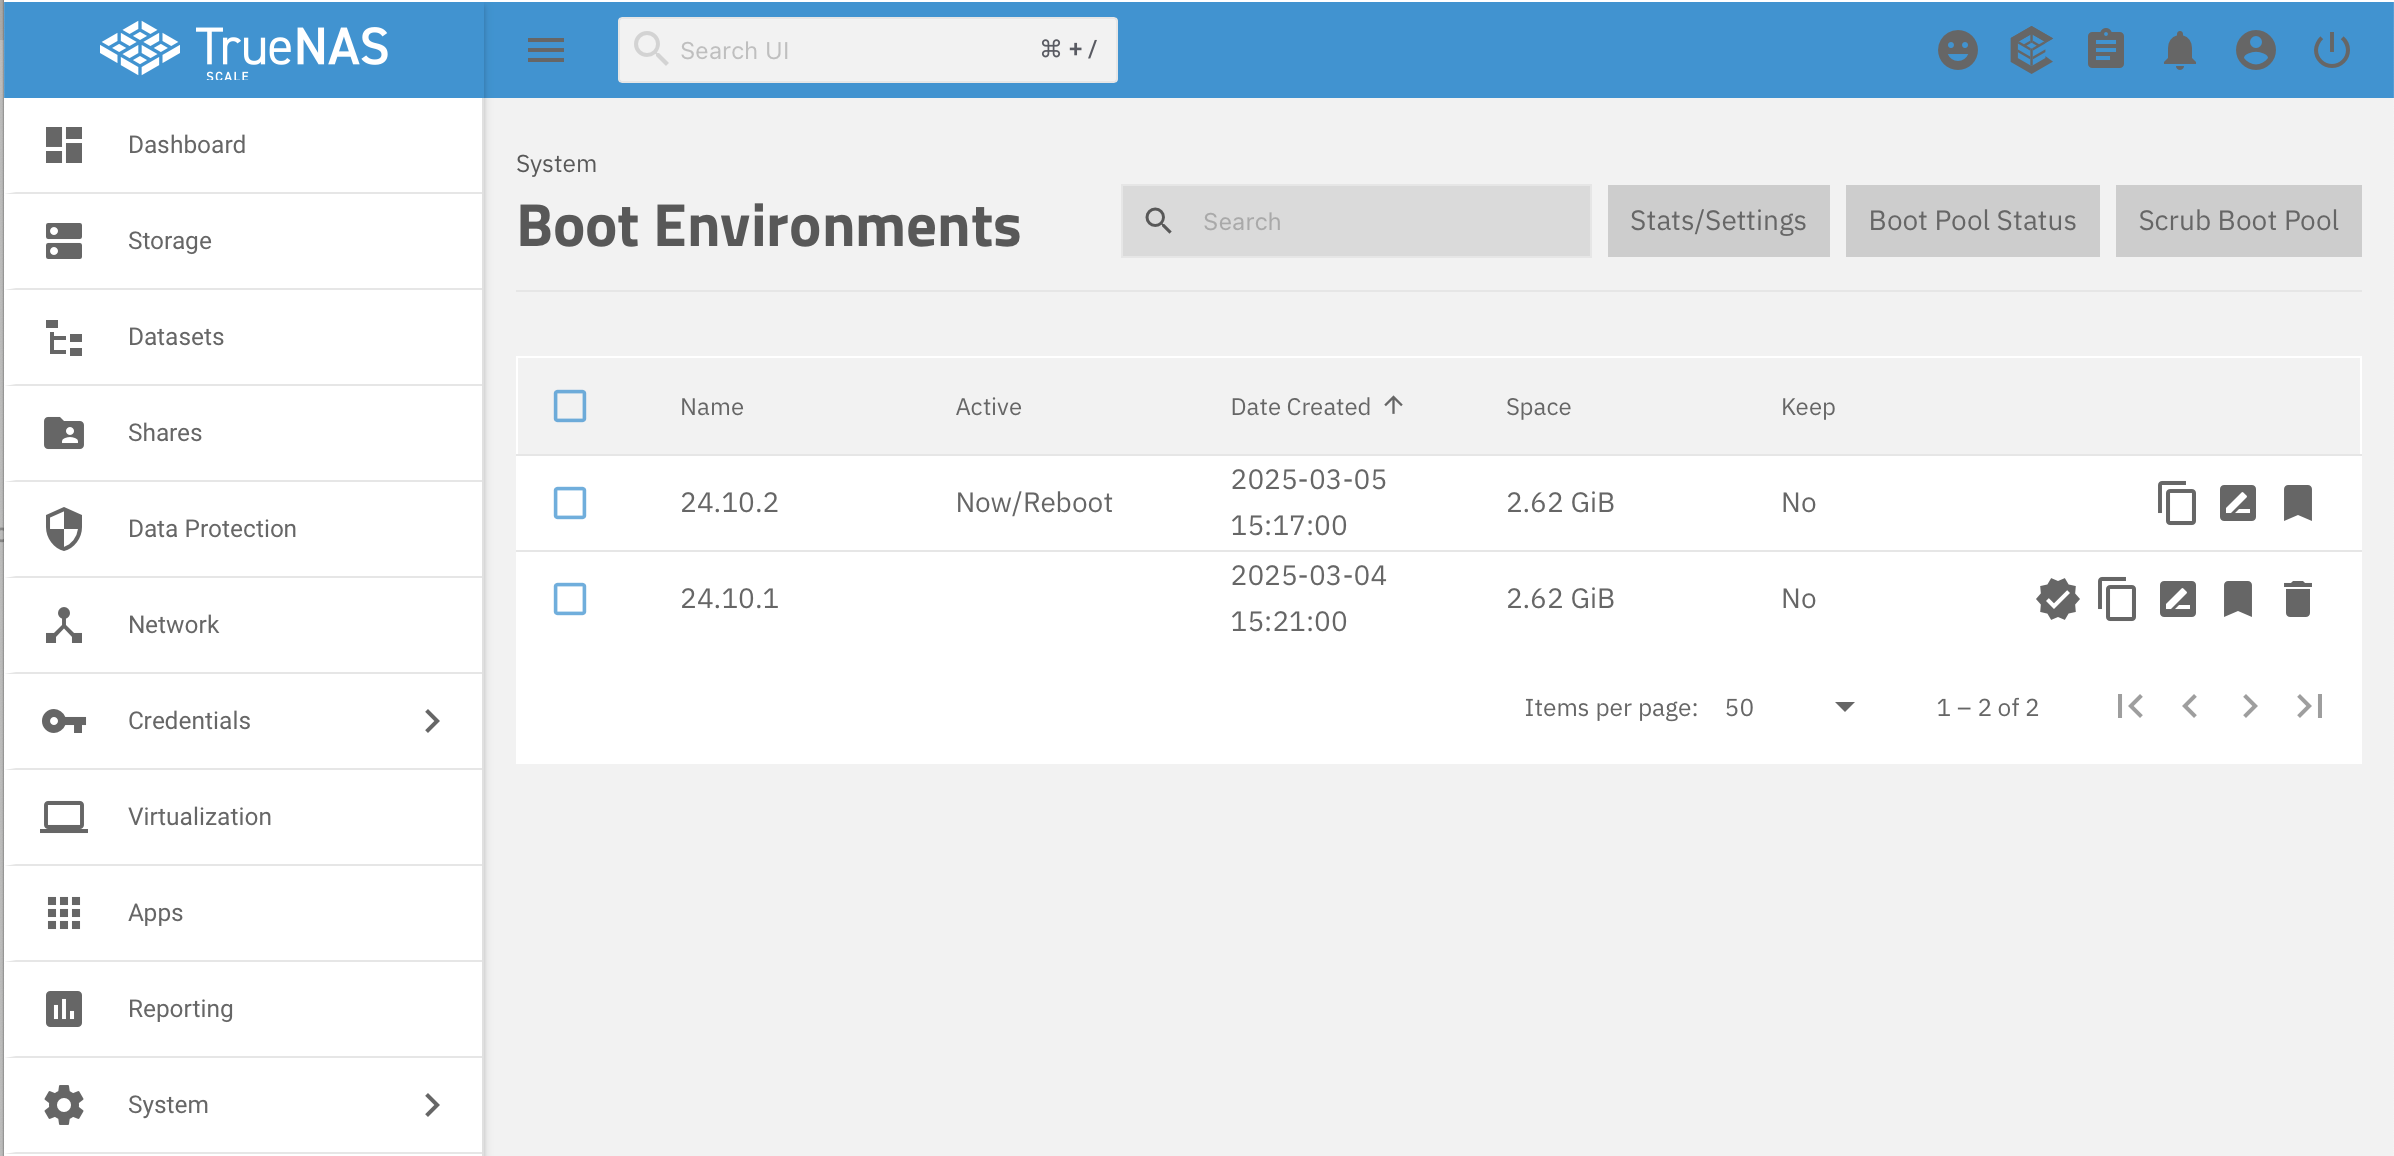
- Click on the Boot Pool Status button in the upper right

- If your
boot-poolis mirrored, expand the mirror by clicking on the arrow to the left of the mirror-0 label
- Click on the three dots to the right of the first device you are fixing, sda3 in this case

- Click on Replace
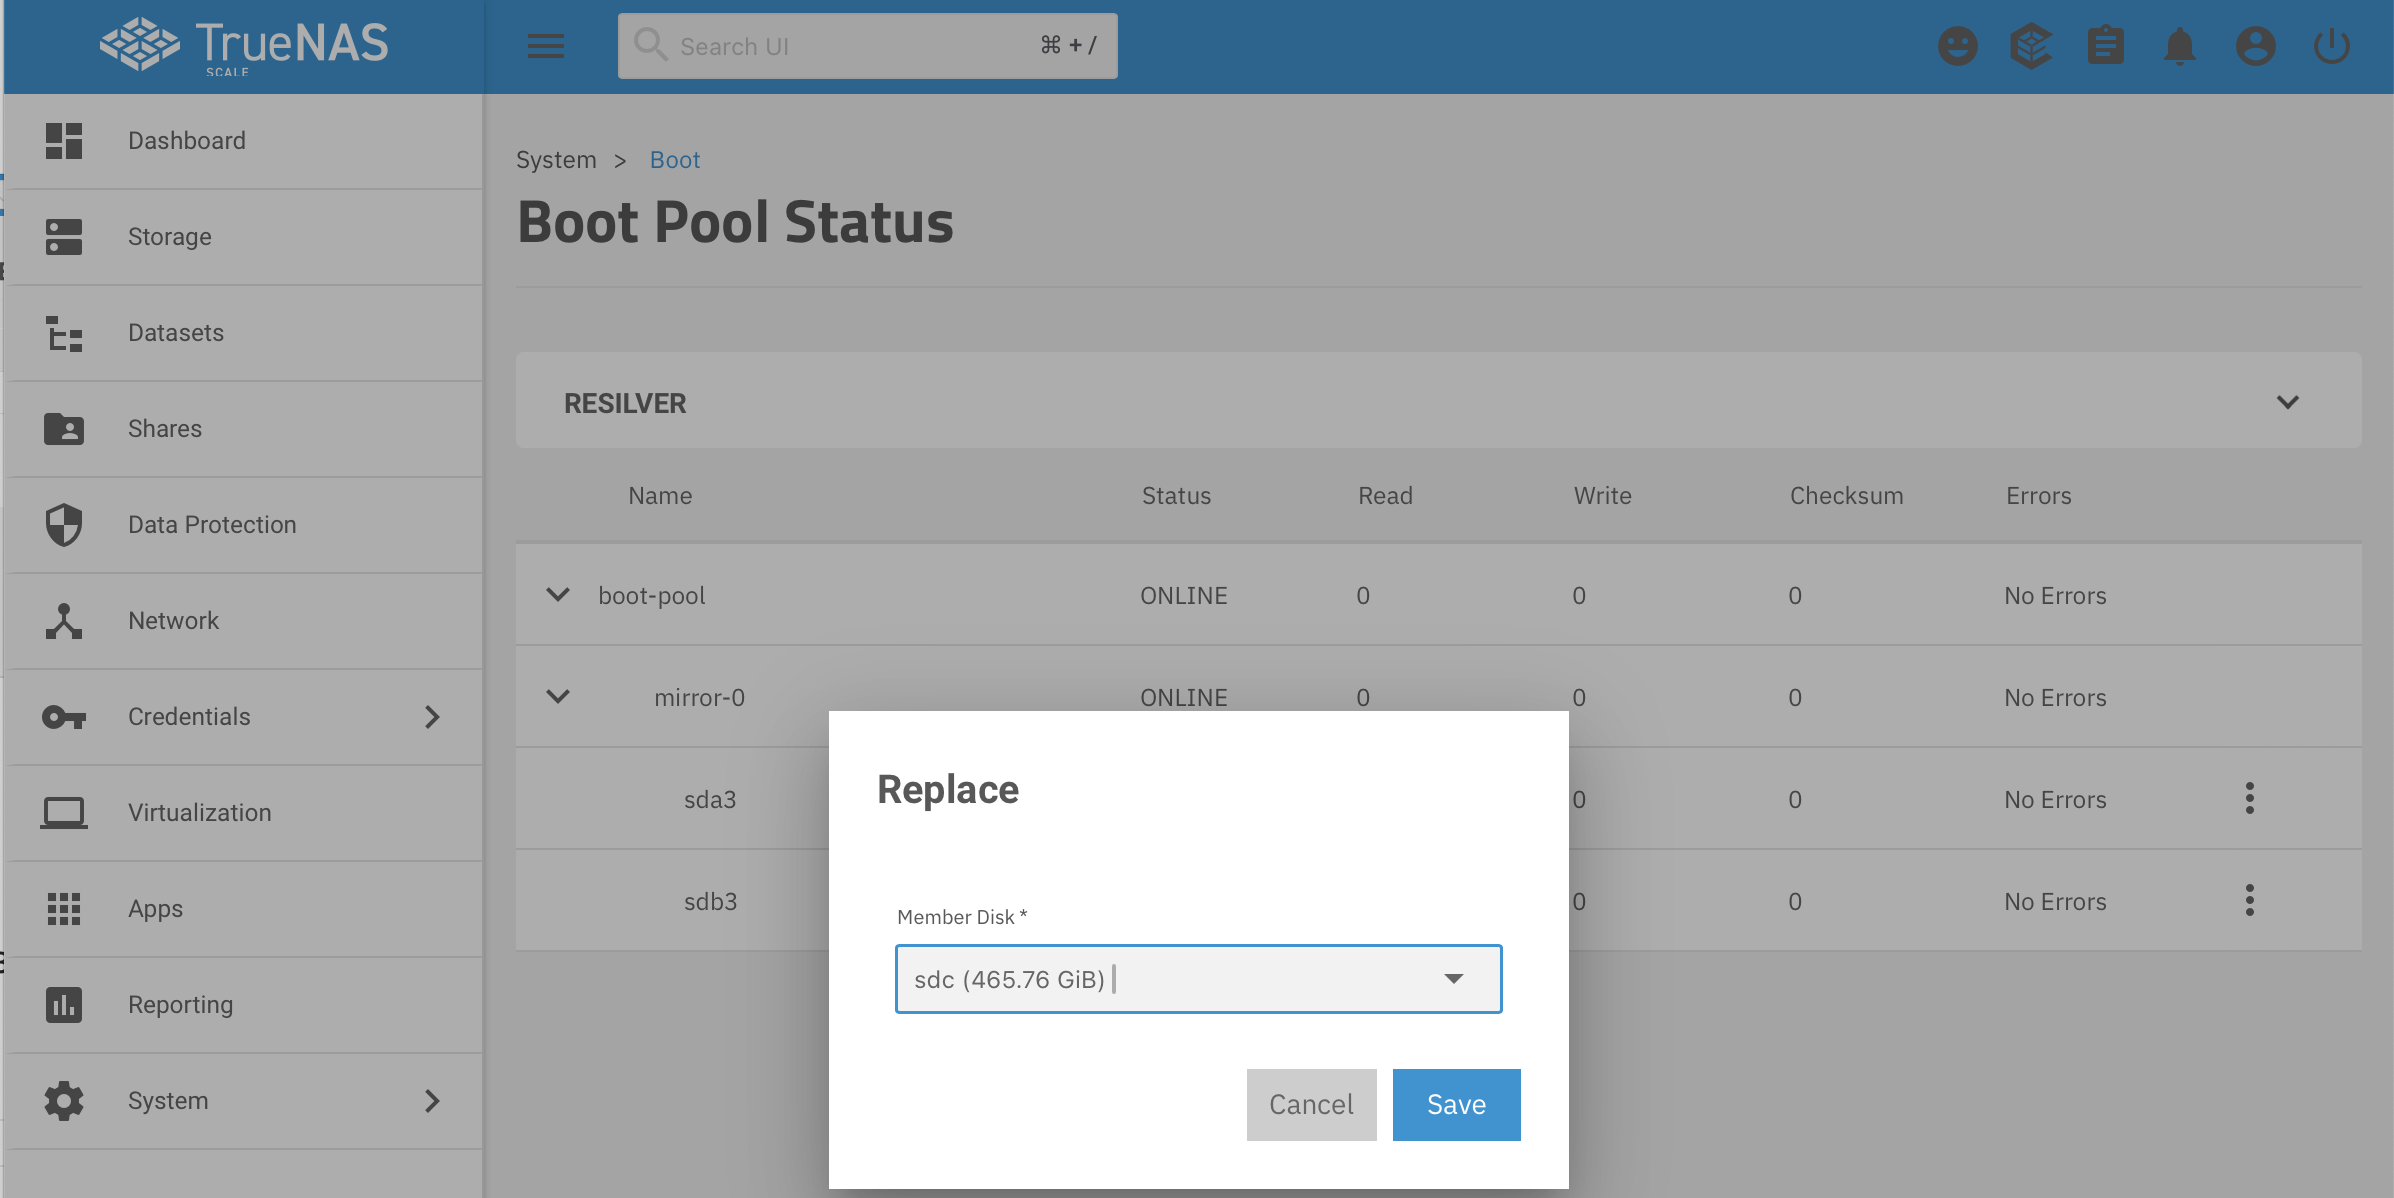
- From the pulldown list, choose a device with enough space. The list will only show unused devices. Then click Save.
- Wait for the mirror replacement to complete

- Click on Storage in the left side navigate and then click the Disks button in the upper right
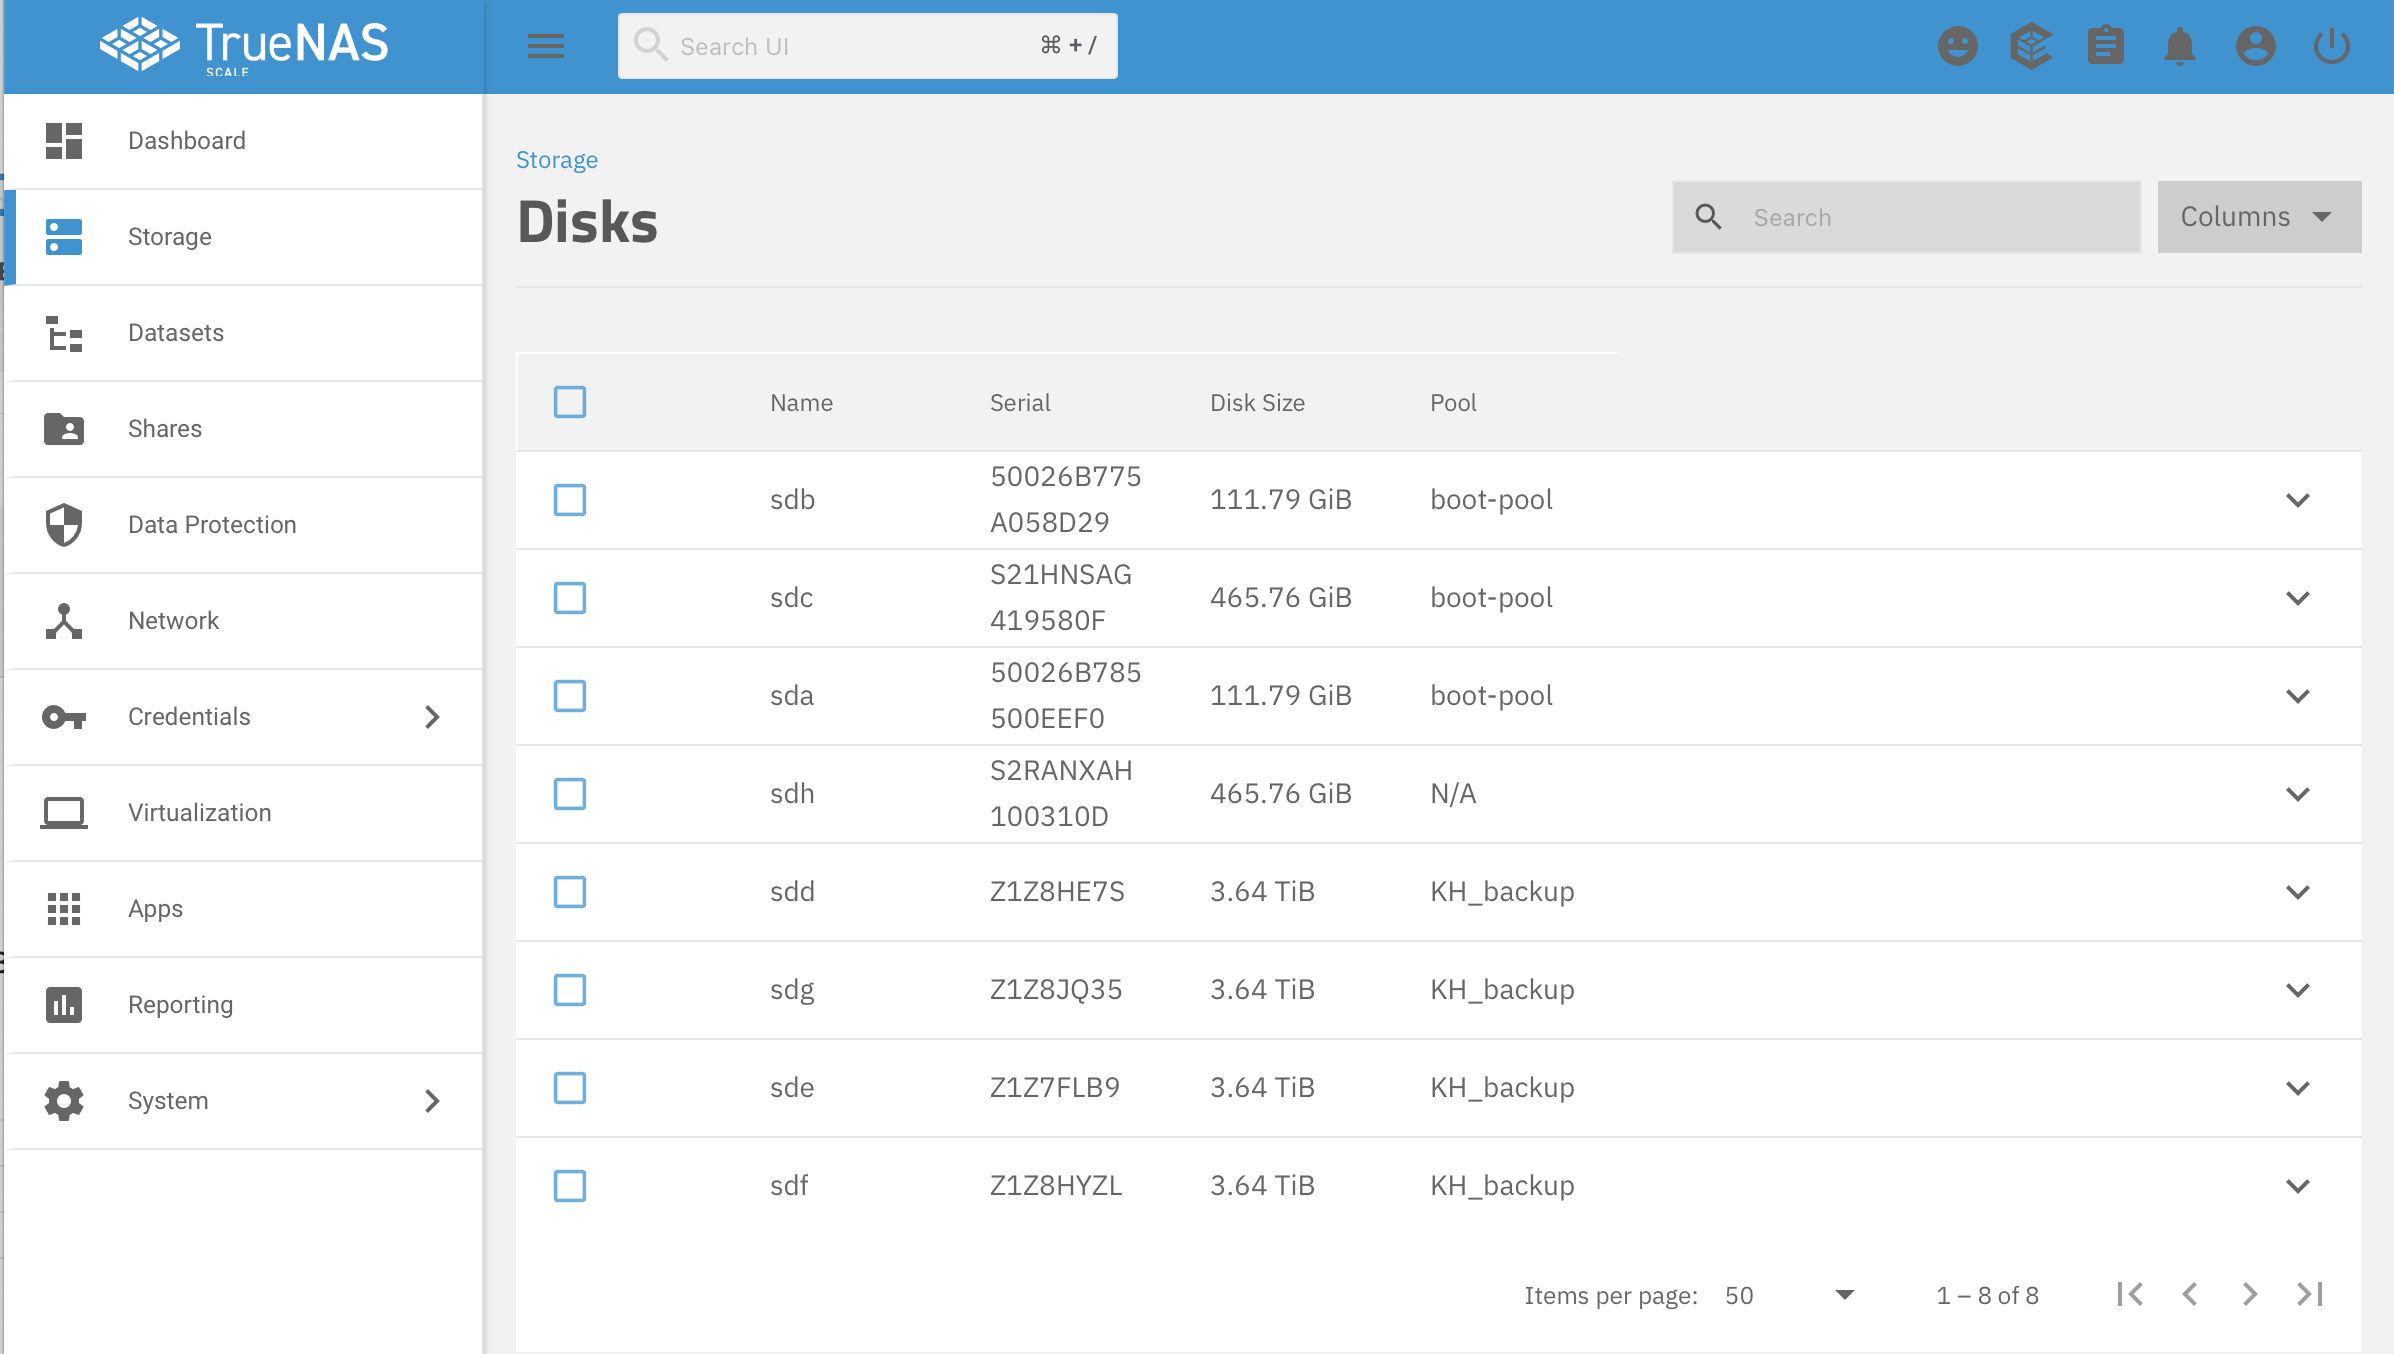 I do not know why the BUI is still showing
 sdais part ofboot-pool, but as we saw in the last screen theboot-poolmirror consists ofsdcandsdb. I suspect a bug in the BUI. - Expand the disk you just removed from
boot-poolwith the arrow on the right side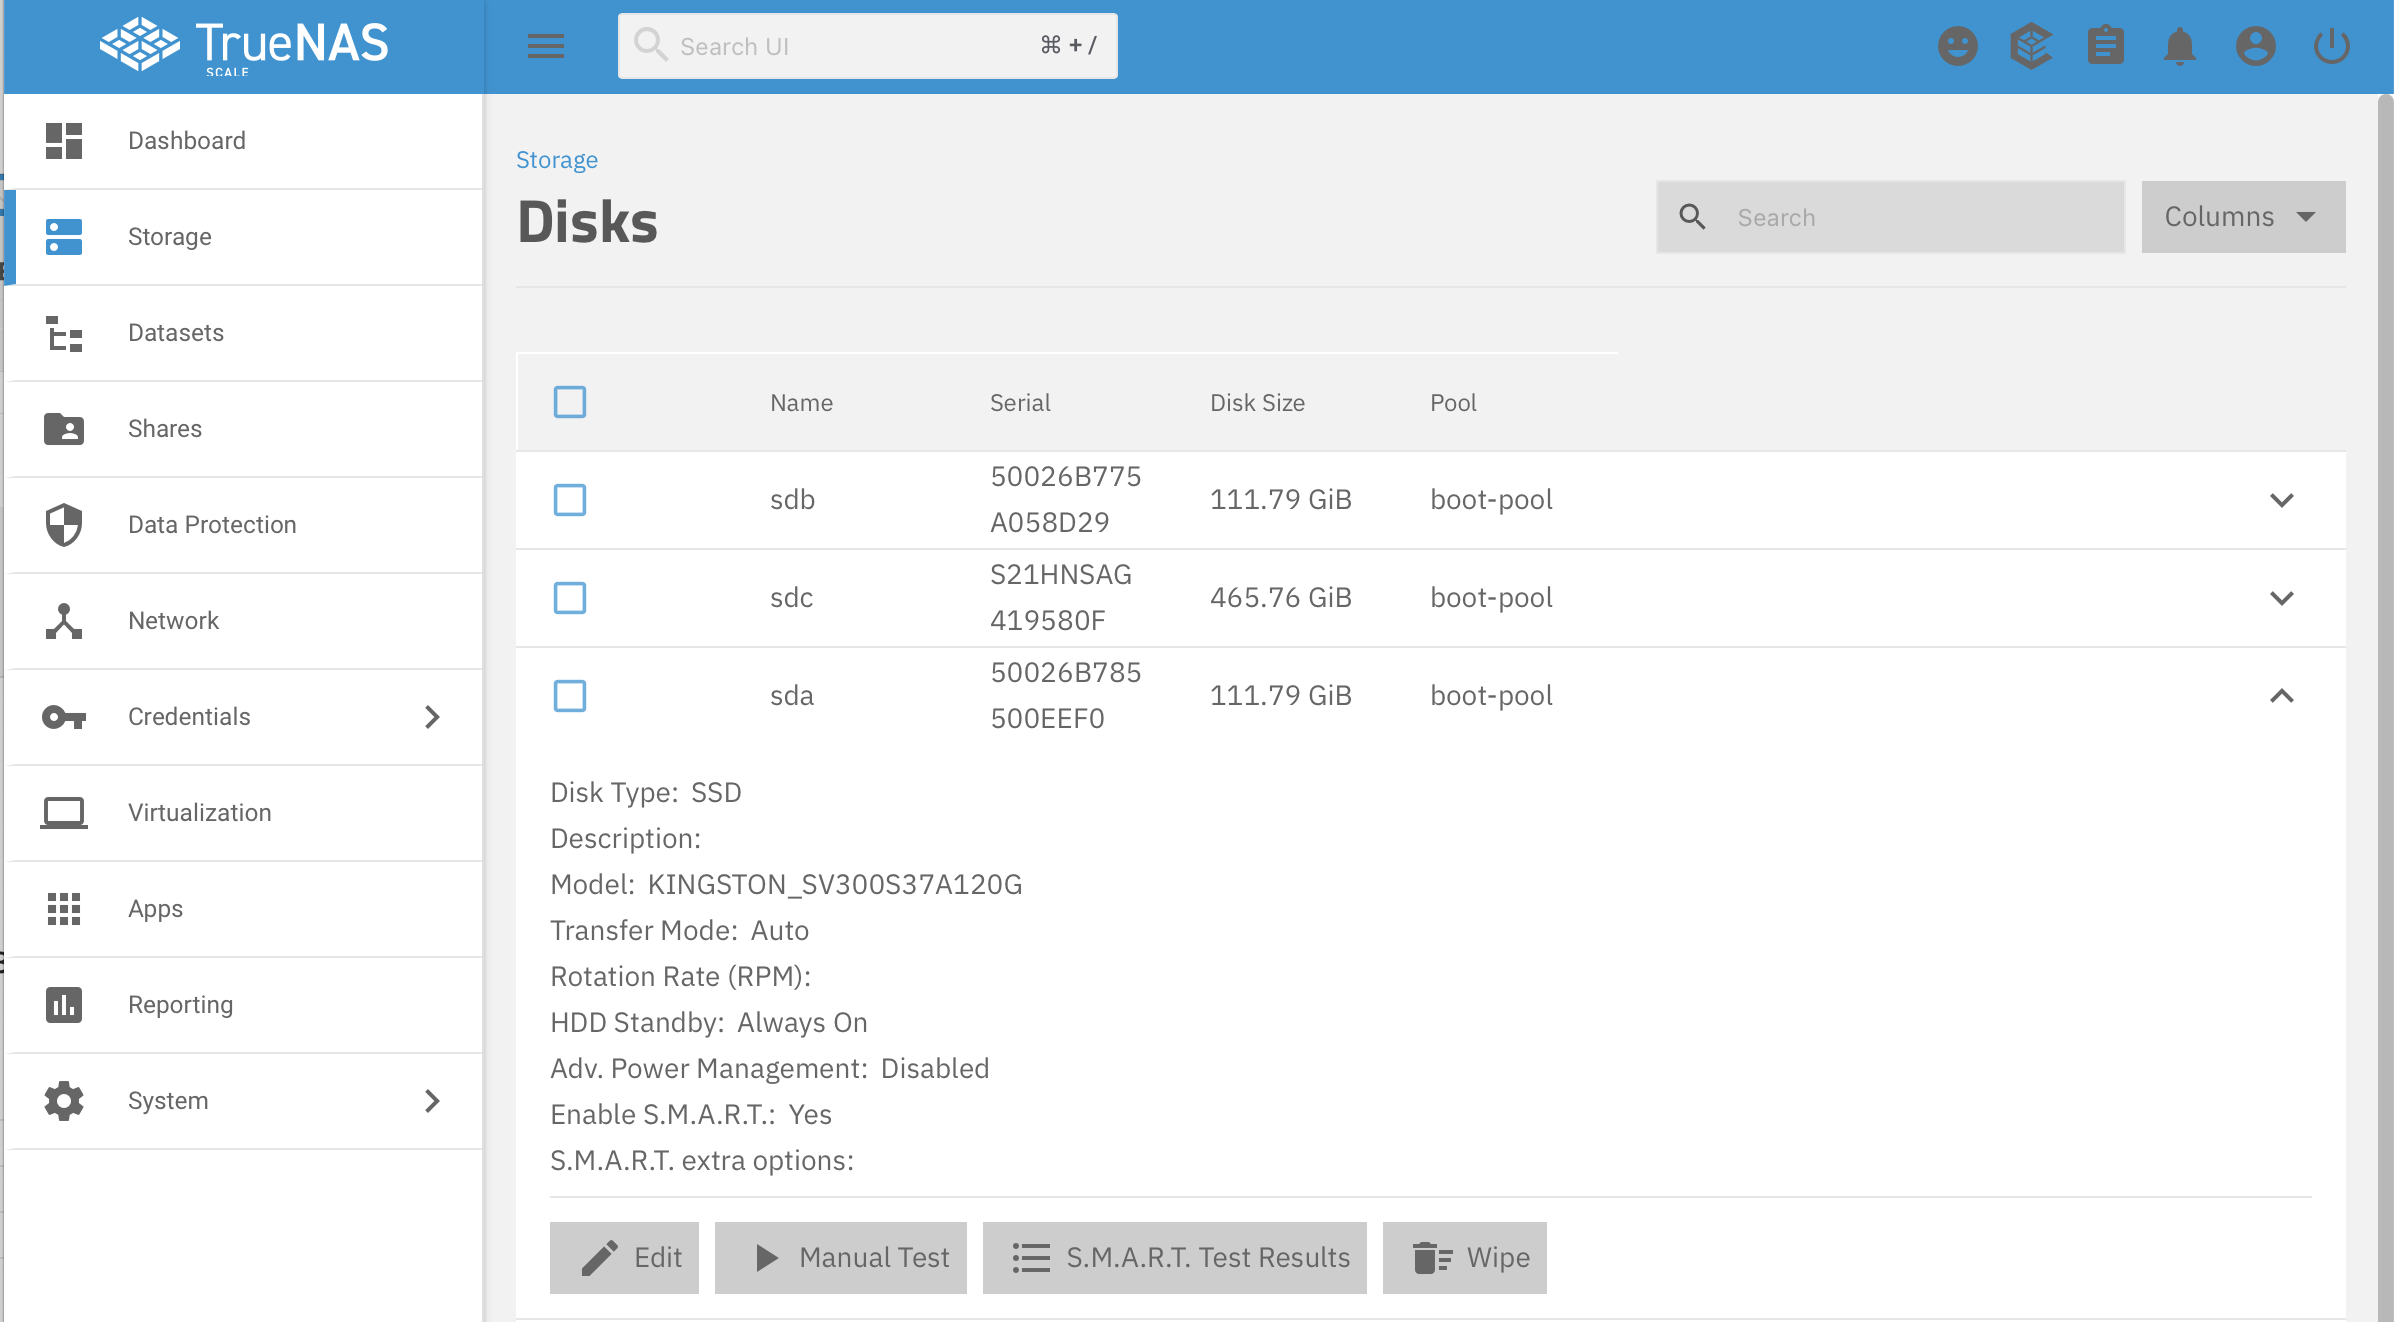
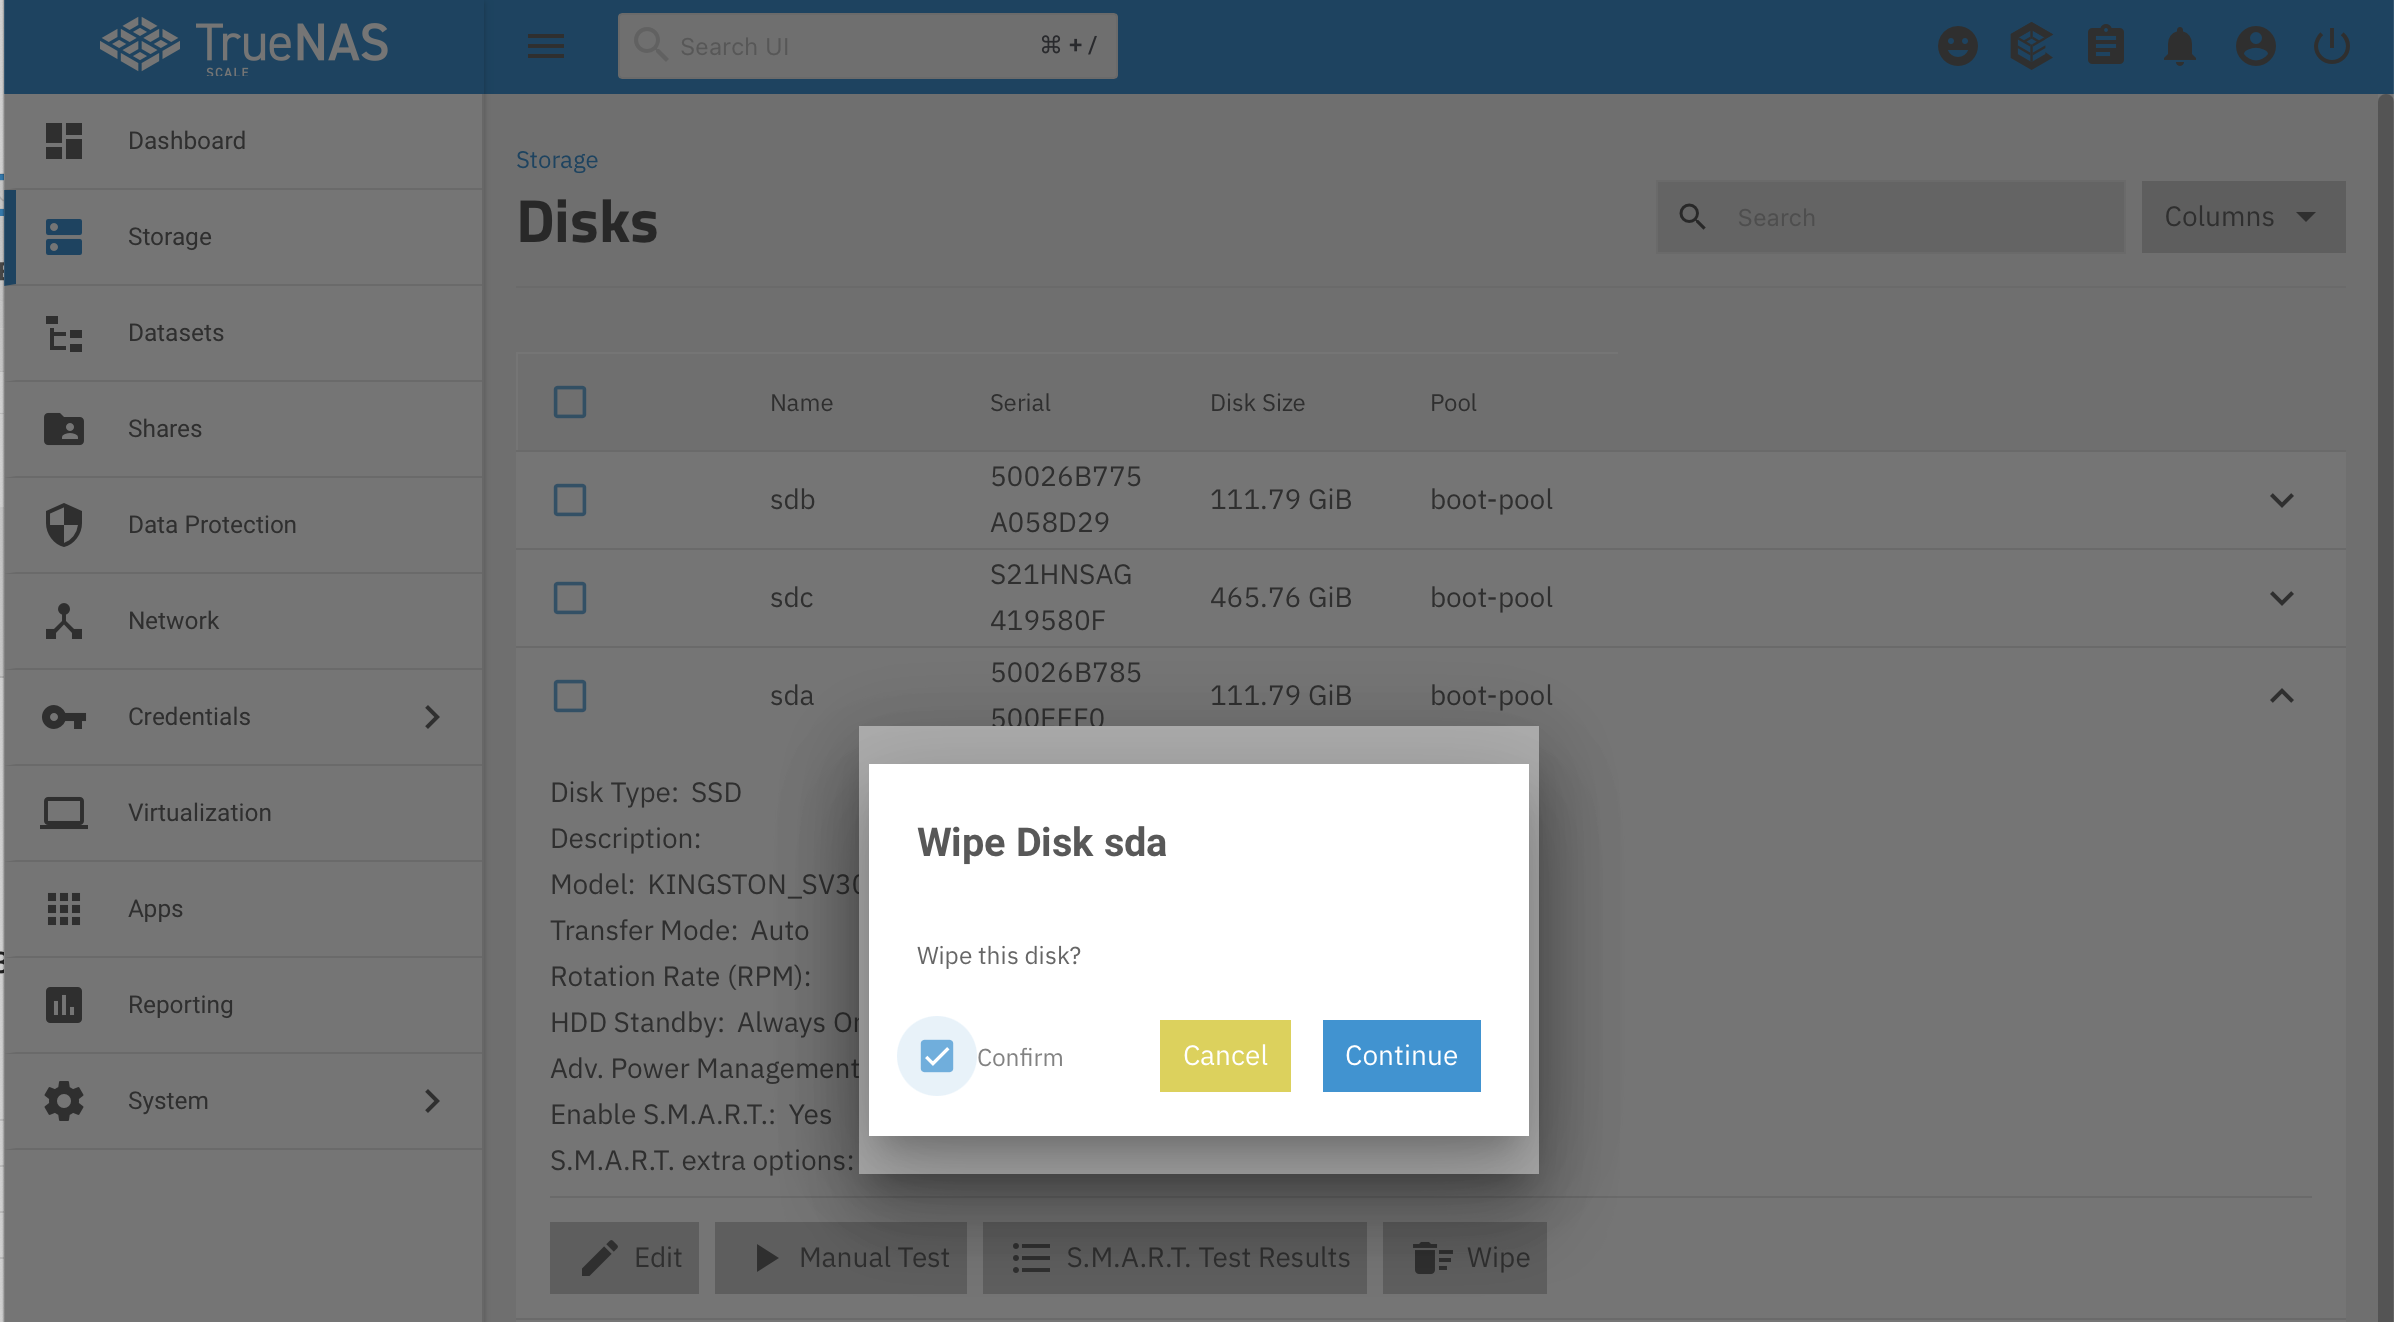
- Click the Wipe button to clear the disk of the bad label(s), a quick wipe is fine for this
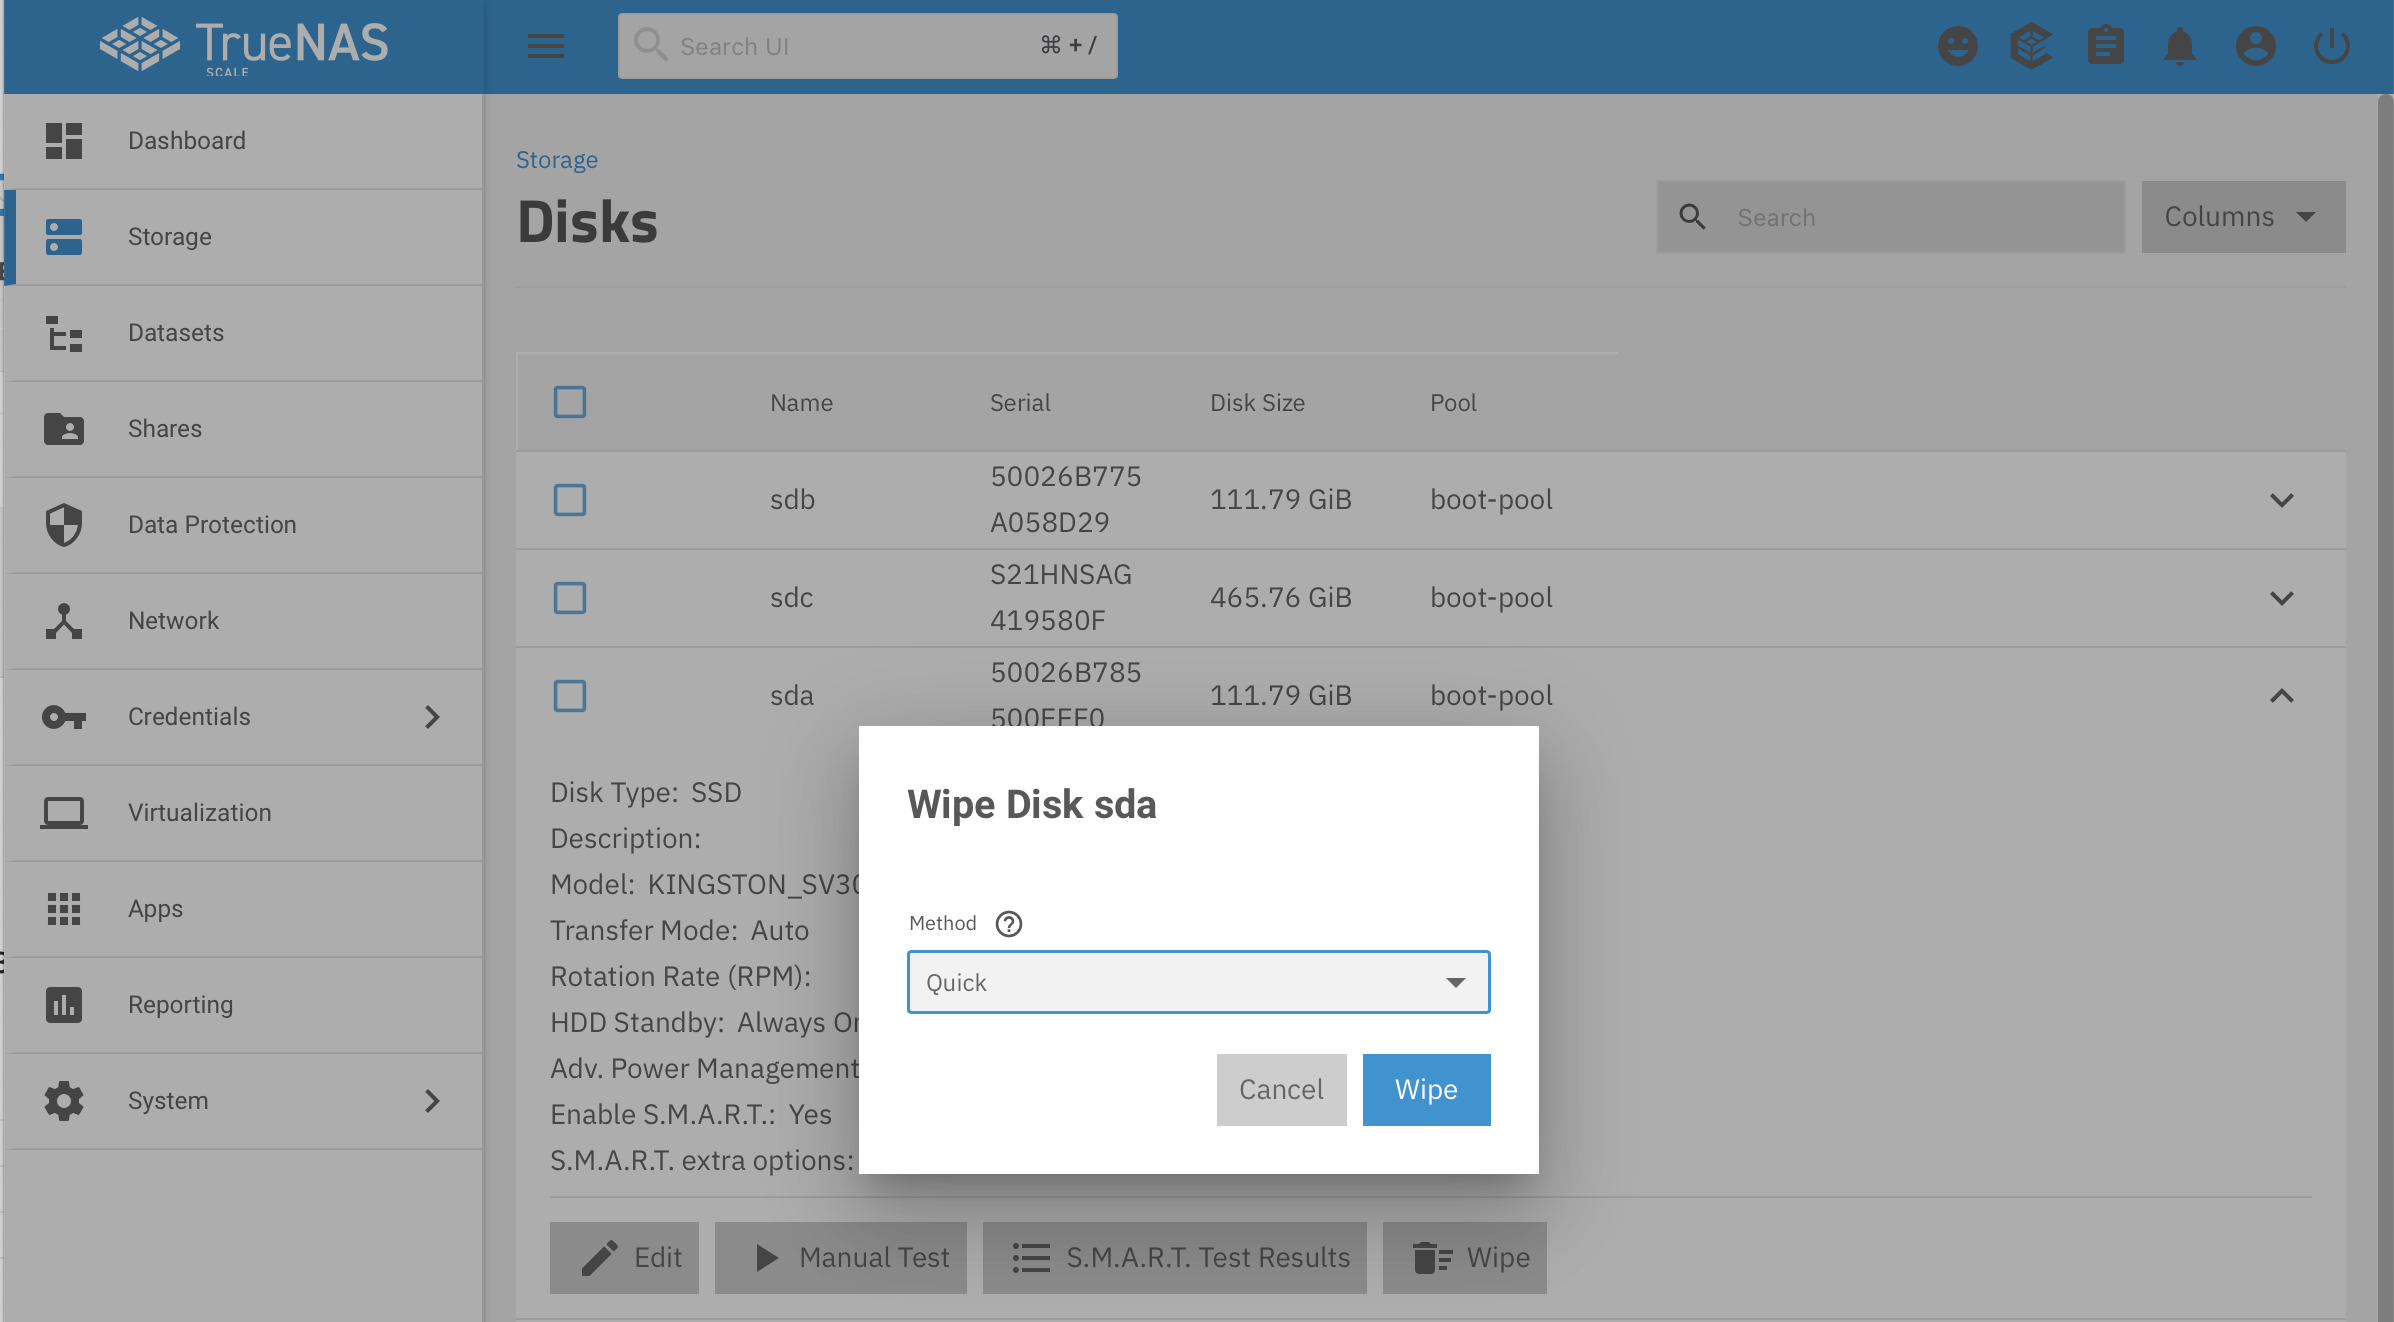
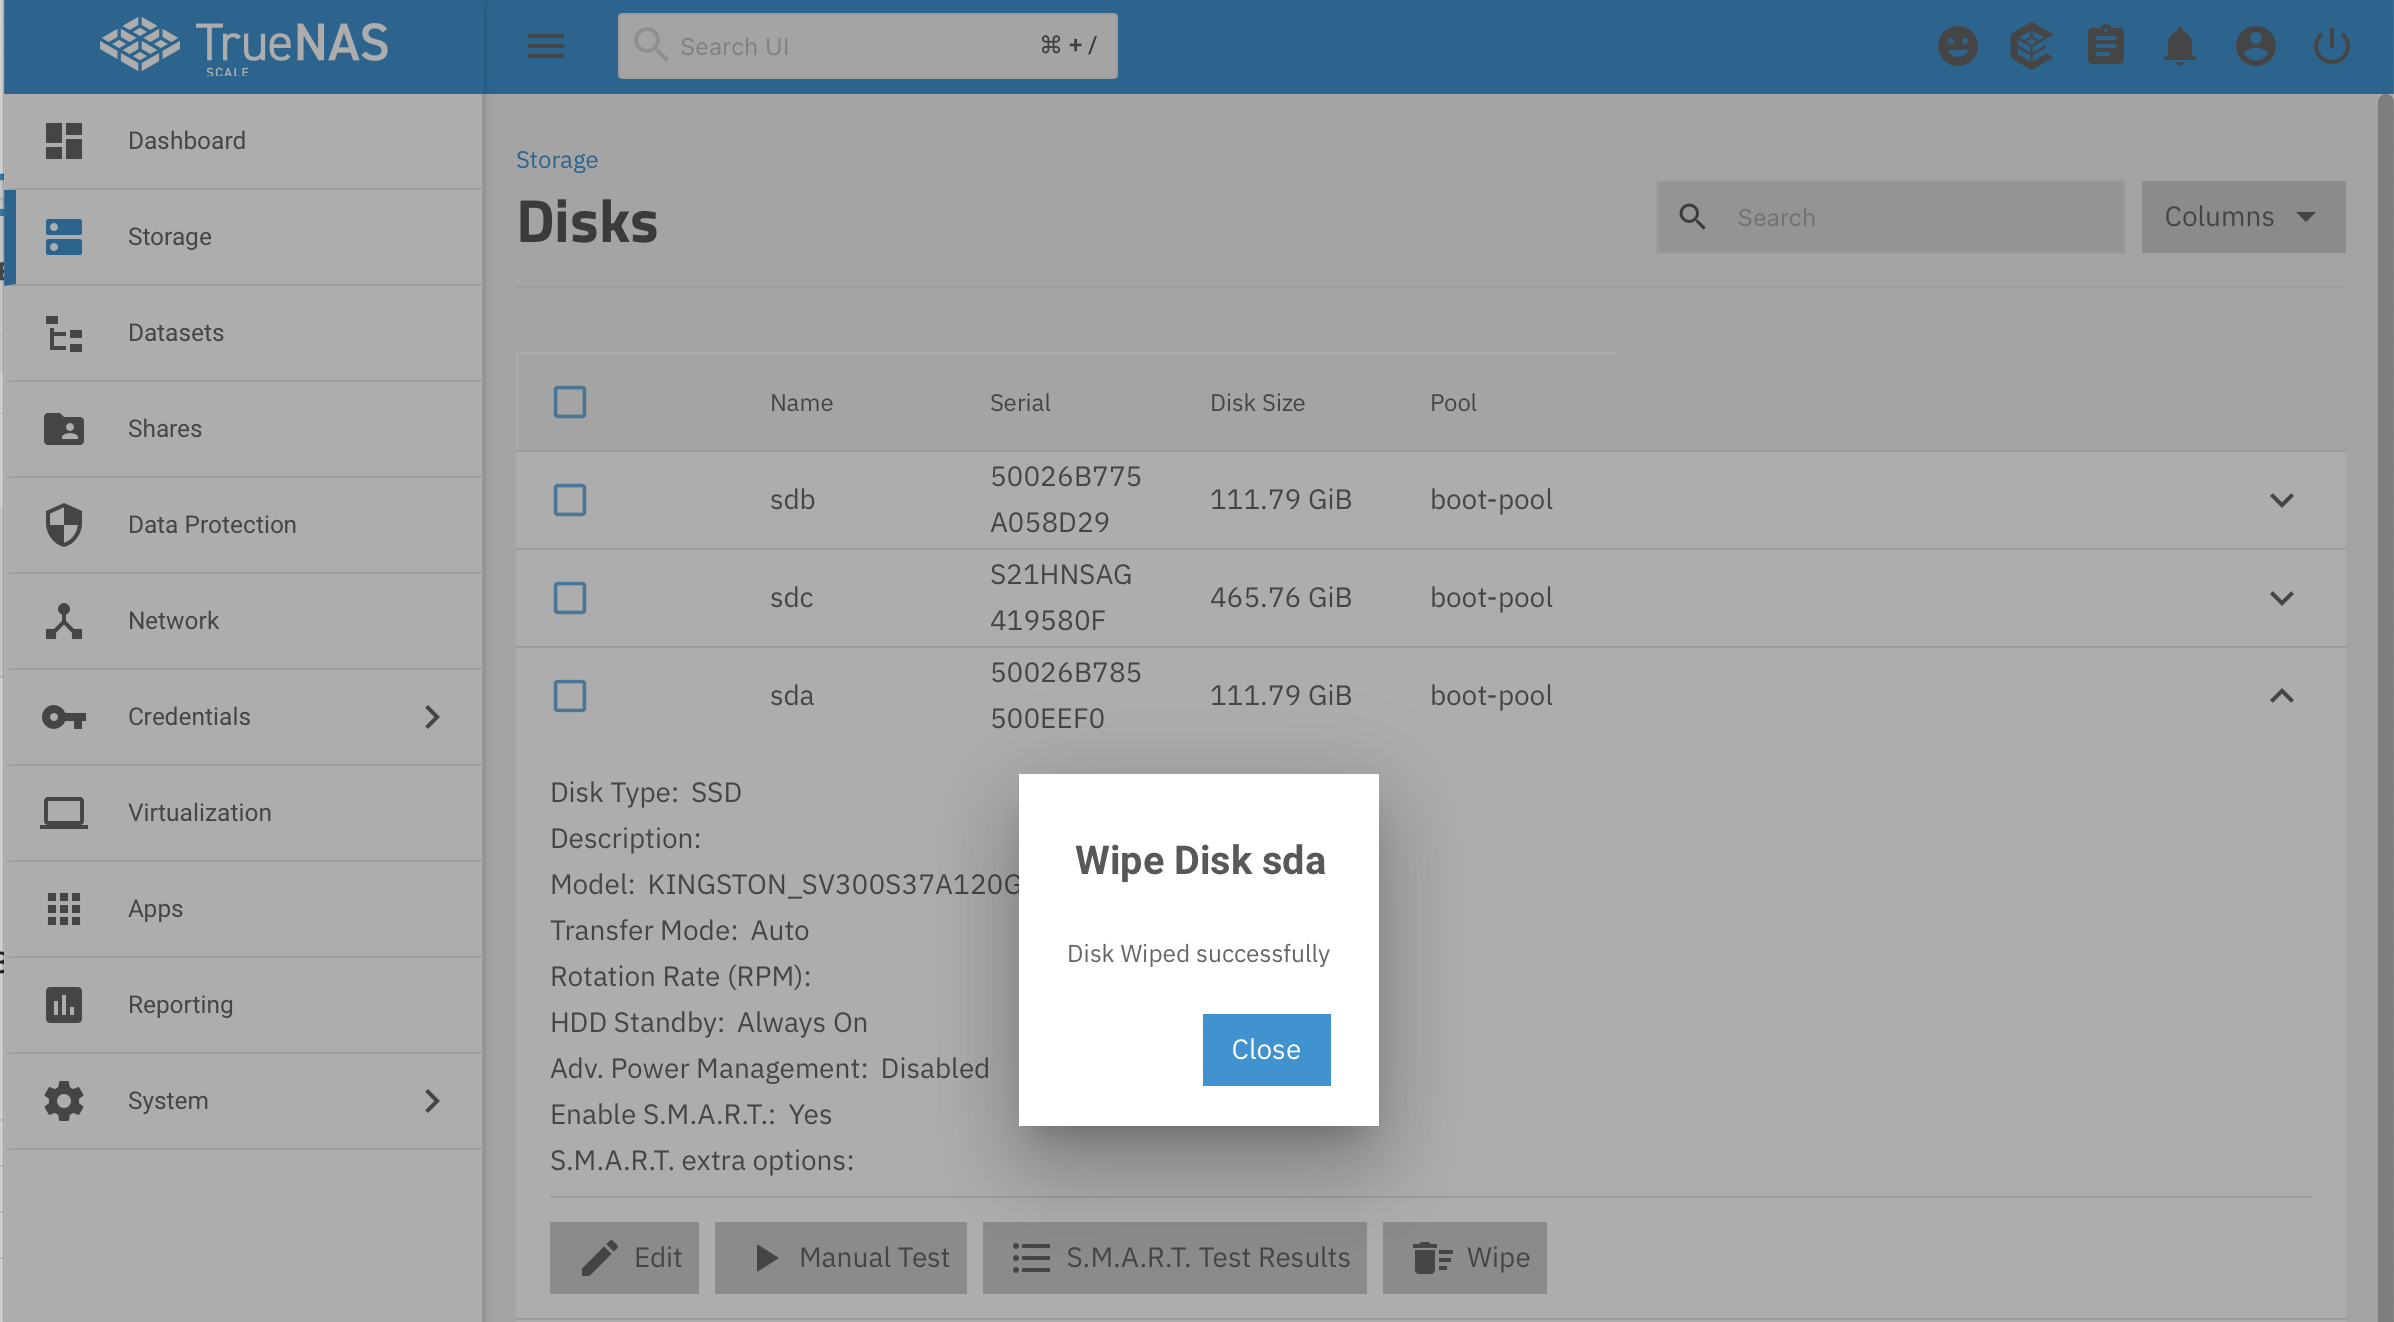
- Click through the confirmations and wait for the wipe to complete
- Go back to System -> Boot and then Boot Pool Status and, if you have a mirrored
boot-pool, expand the mirror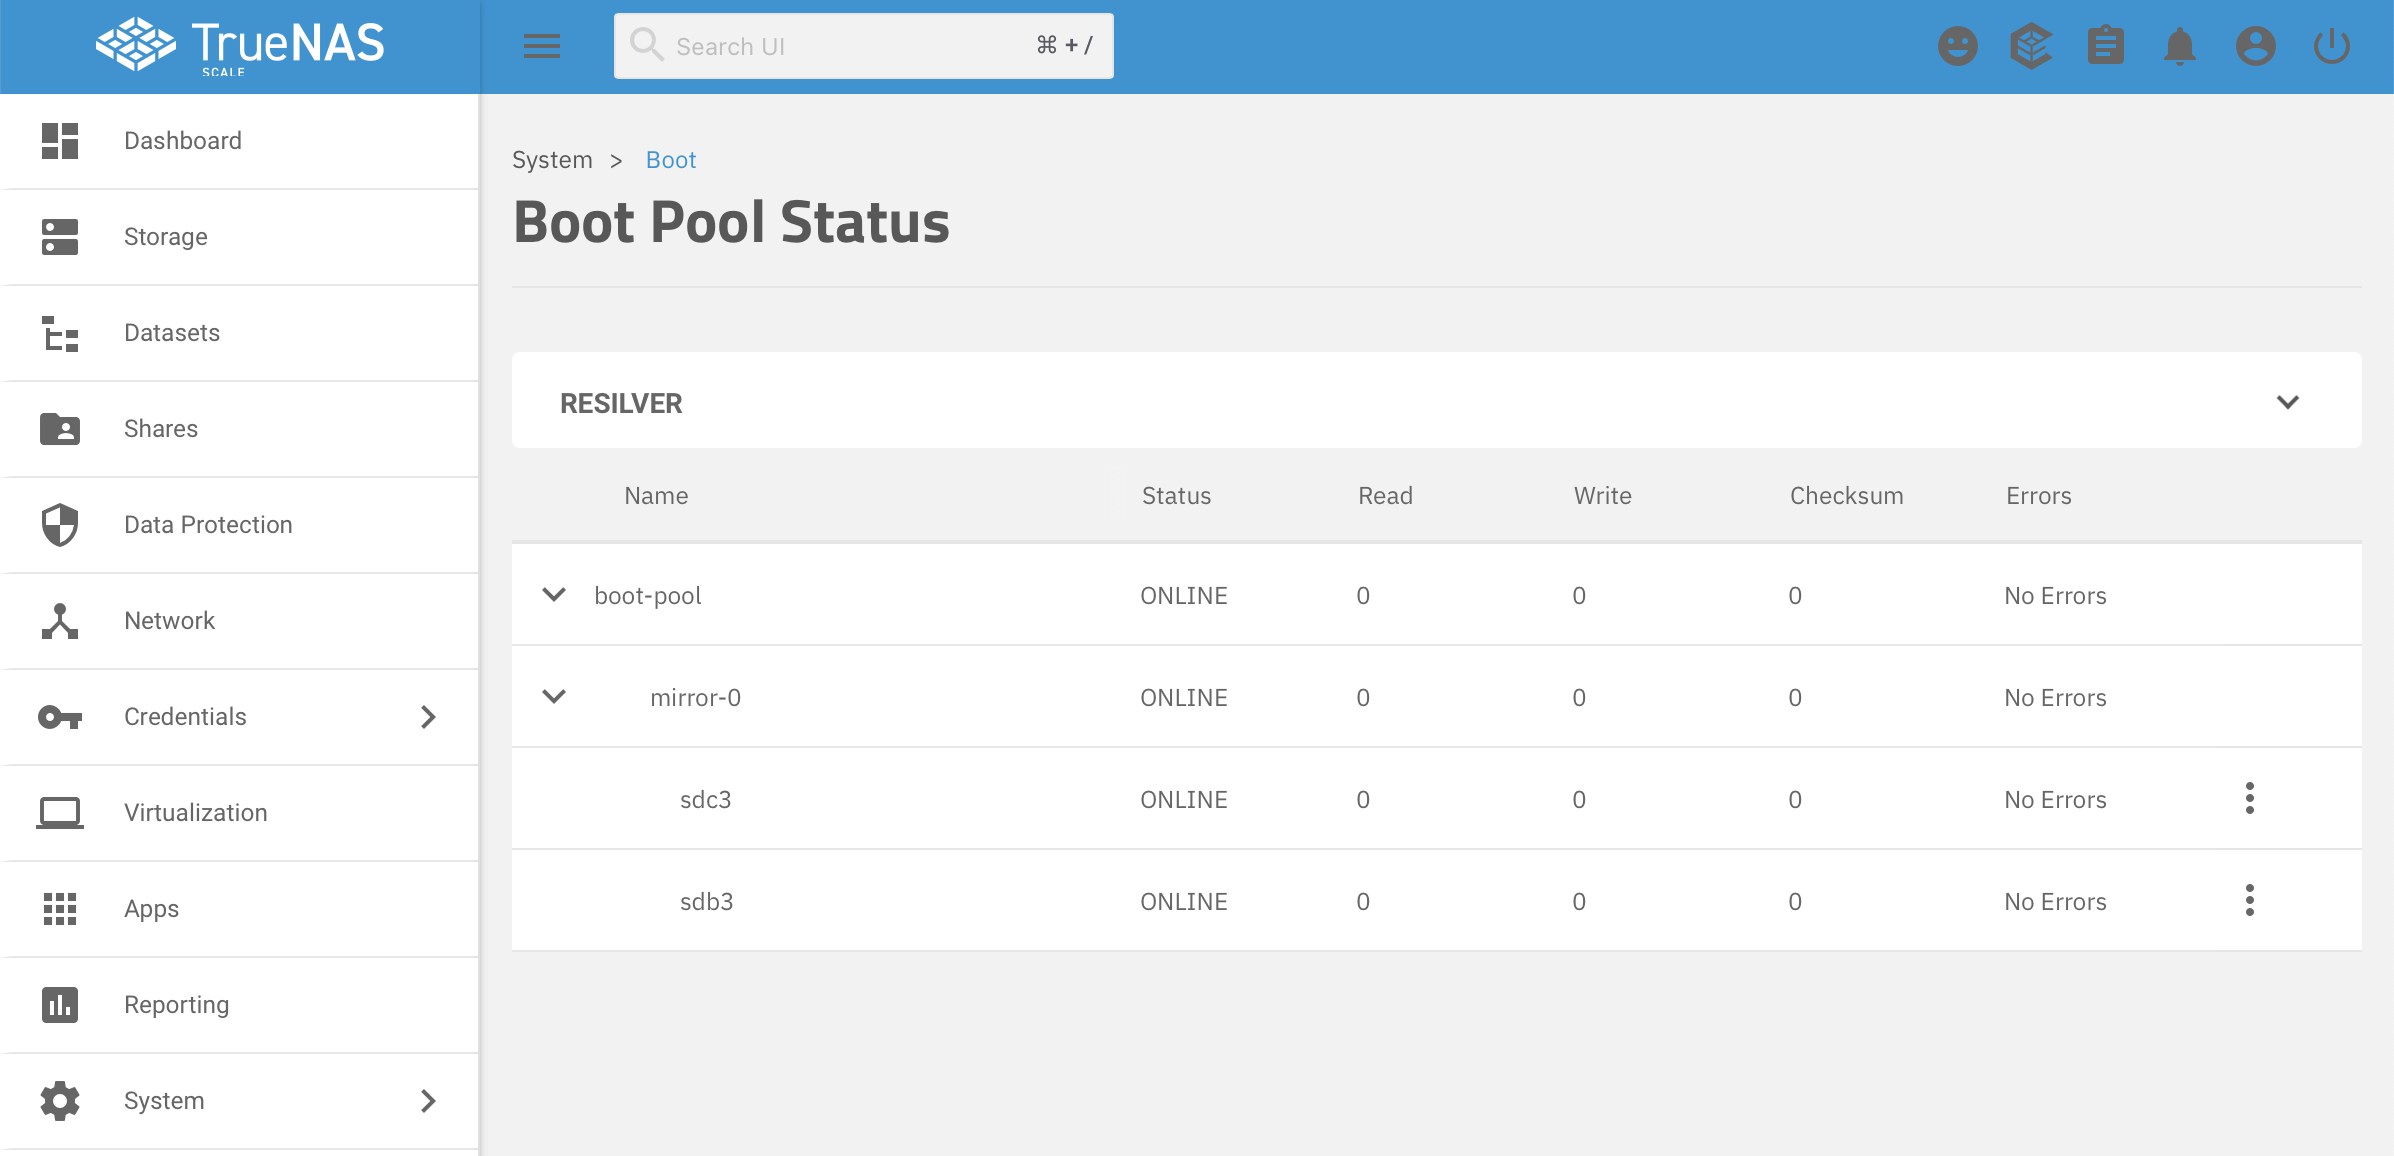
- Click on the three dots on the the right of the temporary device (
sdcin this case), and select Replace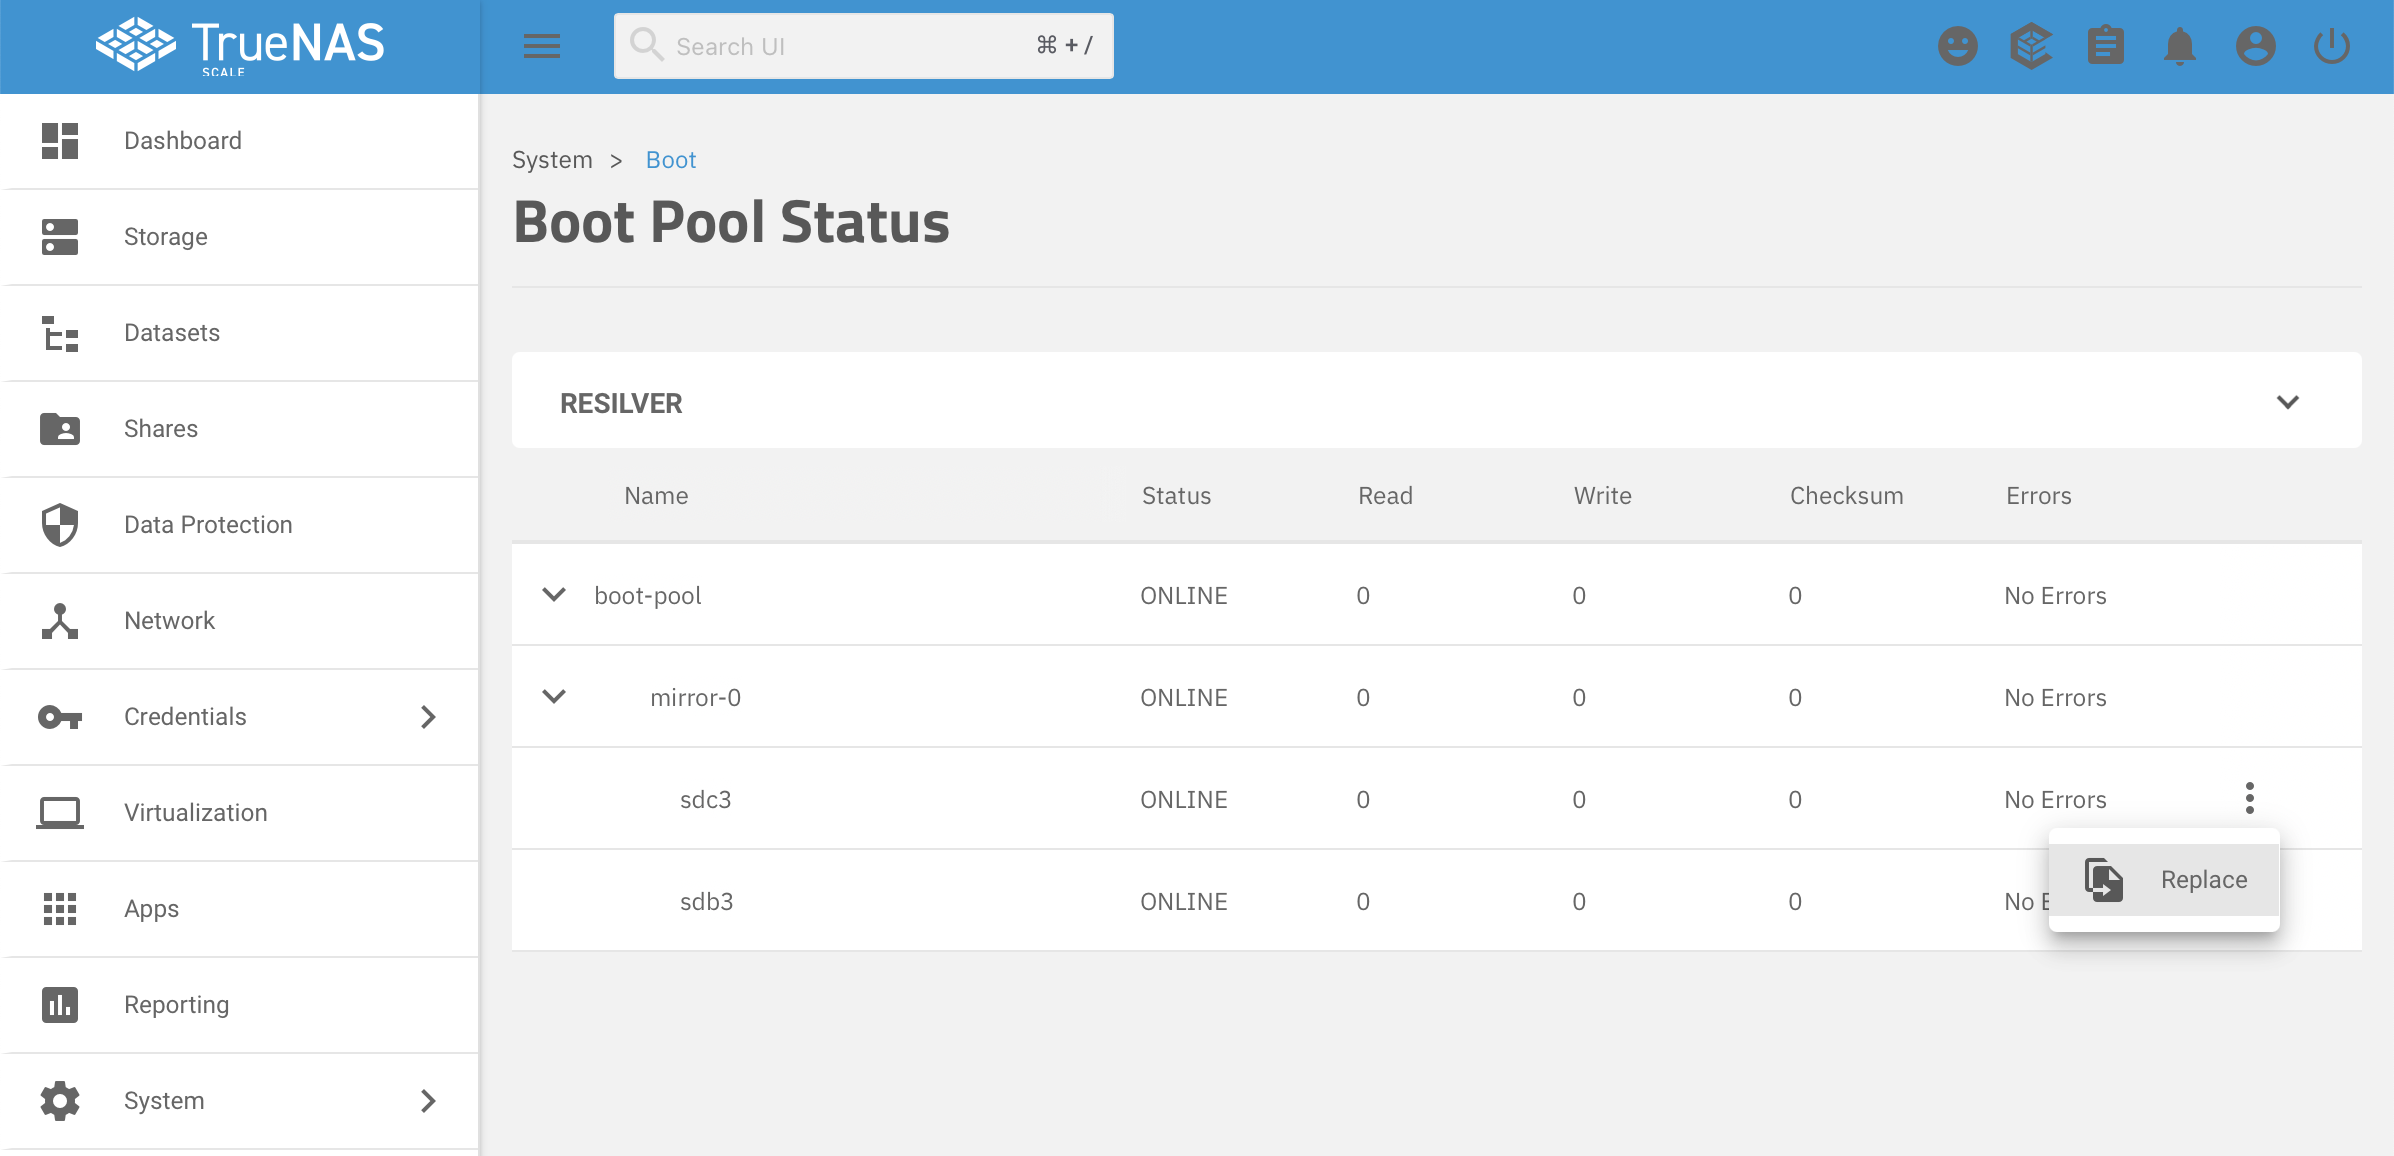
- Choose the original device you just wiped from the pull down menu, and save change

- Wait for replacement to complete, note we are back to the
boot-poolconsisting ofsdaandsdb
- If you have a mirrored
boot-poolyou are not done yet, follow steps 4 through 16 above for the second half of your mirror, replacesdawithsdbin the instructions above. You will replacesdbwithsdcin theboot-pool, then wipesdb, then replacesdcwithsdband you will be done. - The very last step is to reboot you TrueNAS server and watch the console as it boots. It should not hang looking for the
boot-poolzpool. If it does, then there is something wrong other than extraneous, corrupt ZFS disk labels on your boot device(s).
Summary
I hope others found this problem description and repair process helpful.