Author: PK1048

When is Ground not Ground?

A while back I was working entertainment tech for a small convention, I was the Sound Designer and had inherited the Power Design (usually done by the Lighting department, but we did not find a Lighting Designer until very late). The event was held at a hotel with a 4-section ballroom, call the sections 1, 2, 3, and 4. The stage was set in section 4 and we had a social event in sections 1 and 2 on Friday night with the airwall between 2 and 3 in place. After the social event the airwall between 2 and 3 was struck and the airwall between 1 and 2 was installed. For the remainder of the weekend events were on the stage in section 4 with audience in sections 2 and 3 and section 1 was the performer Green Room.

Power

We were told that we had one 100A 3-phase feed to use (as per the contract with the hotel). We were also told that there were feeders in the airwall pockets between sections 1 and 2 and sections 3 and 4. Call the pocket between 1 and 2 feeder A and the feeder between 3 and 4 we’ll call C and we’ll leave the label feeder B for the airwall pocket between sections 2 and 3 (which we were told did not have a feeder). We decided to use feeder C (airwall pocket between section 3 and 4, nearest to the stage).

100A of 3-phase 120v/208v power gives us 300A of single phase 120v power, but for safety I derated to 80% or 240A. I built the power budget and came out to just about 230A. I assembled my equipment (PDUs) and cable (cam-lock feeders, as well as NEMA 5-15 extension cords) to handle all our needs assuming we were getting all our power from feeder C near the stage.

Contact with the Enemy

When we arrived on Friday morning we discovered that feeder A and C were not 100A, but only 80A. Feeder B was 100A, but if we used it, then we would end up with a PDU in a bad location due to cable lengths. Feeder A and C both came from a power panel in the kitchen behind the ballroom. Feeder B came from a different panel further back in the kitchen, and that panel also fed the panel that fed A and C. Like this:

Panel 1 -> Feeder B (100A)

Panel 1 -> Panel 2 -> Feeder A and C (80A)

We contacted Hotel Engineering and they apologized for getting us bad information. They offered to let us use as many of the different power feeds that we needed to, at no extra cost, to get the job done.

We were not comfortable using just the 80A feeder C as we were very close to that total draw and rather than use feeder B and have a PDU badly located, and against my better judgement, we decided to split the power between feeder C (for the stage) and feeder B (sound and lighting control points and video production control all at the back of the room). We knew where each feeder came from, we knew how the panels tied together, what could go wrong?

Friday night, after the social event, we started setting up the sound and lighting control riser; the video crew started building video production control on the other side of the room. I was the first to tie the two power feeds together when I plugged the mixer outputs into the snake feeding the FOH amp rack. As soon as the connectors mated I heard a hum out of the mains. I immediately knew what was going on. I called the crew together and told them we had a serious potential difference between safety grounds between feeder B and C. One of the crew grabbed a 100′ 12/3 extension cord and ran it diagonally across the room from feeder C to the sound board. We measured over 100mV between the safety ground pins. We assumed there was a wiring fault somewhere between the panels and feeders.

So what do we do now? The first thought was to use a bonding conductor to tie the two safety grounds together. We tried connecting the ground pin of that extension cord to the ground pin of the power from feeder B. That reduced the hum by about 20 dB, but it was still clearly audible. It was clear that we could not get a low enough impedance connection with the 12 AWG power cords we had with us.

We ended up, at midnight, redesigning the power distribution based on the parts we had on hand. We used feeder B since it could carry our full load. One of the PDUs that we added to the order at the last minute combined with multiple sets of camlock T’s of various genders, enabled us to get power where we needed it, but it was not pretty.
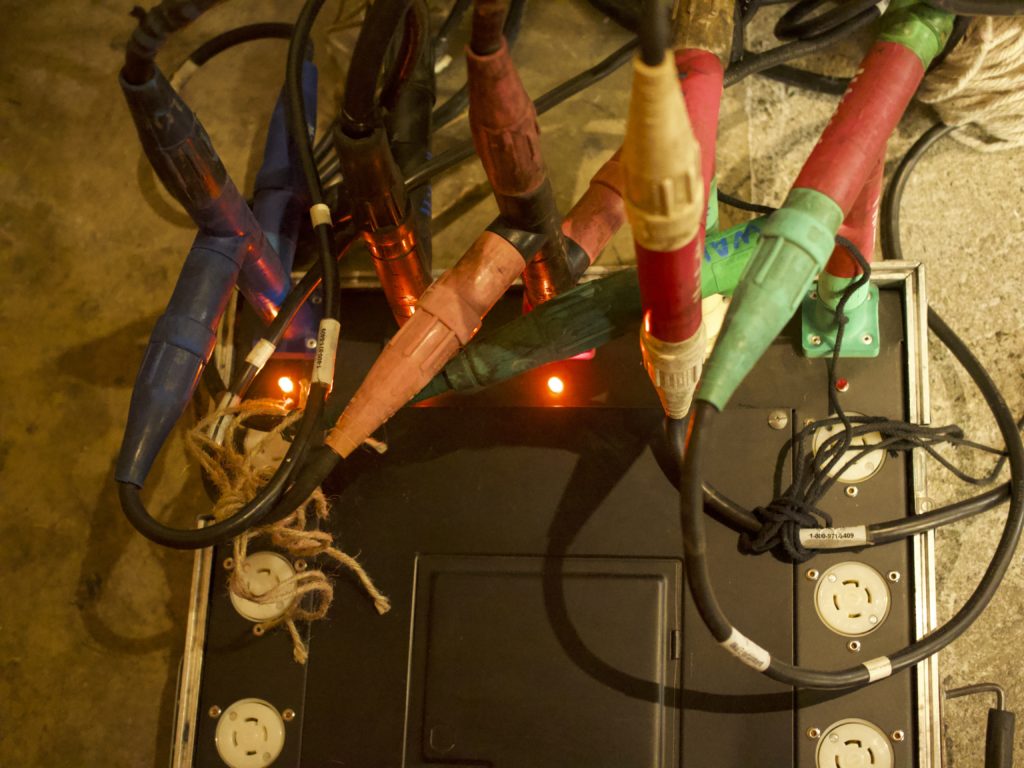
Splitting power at the first PDU

1998 Audi A4 quattro Avant – 250,000 miles and still counting

My 1998 Audi A4 quattro Avant (station wagon) crossed 250,000 miles few weeks ago and while it is still going strong, it does need some attention. This car is the 2.8L 30V 5-speed configuration (2.8 litres displacement, 30 valves, yes, that means 5 valves per cylinder, and 5-speed manual transmission). I started working on the suspension last year and got the rear springs and shocks replaced, I have the new front springs and shocks, but have not had the time to fit them. Oh, yeah, the springs are the Vogtland 35mm lowered sport spring set and the shocks are Bilstein Sport. So the car has been riding lower in the rear than the front since last December. It has needed a new clutch for the past 20,000 miles, I just keep nursing it along. The subwoofer in the cargo area in the back needs to have it’s foam surround replaced. I have a set of steel brake lines to replace the six short rubber hoses. Nothing major …

After meeting with my mechanic a few weeks ago we identified a couple other things the car needed. The first order of business was to address a very slight mis-fire at low speeds and under heavy load. My guess was spark plug, wire, or ignition coil pack as low speed and heavy load put the highest demands on the ignition system. The car was not showing any ignition related fault codes, and my mechanic said that any ignition coil fault would set a fault code. He also flagged that the valve cover gaskets were leaking and letting oil seep into the spark plug well and contaminate the plugs.

So this weekend I tackled the valve cover gaskets / spake plugs / plug wires and general cleanup. I also replaced the cracked brake fluid reservoir.

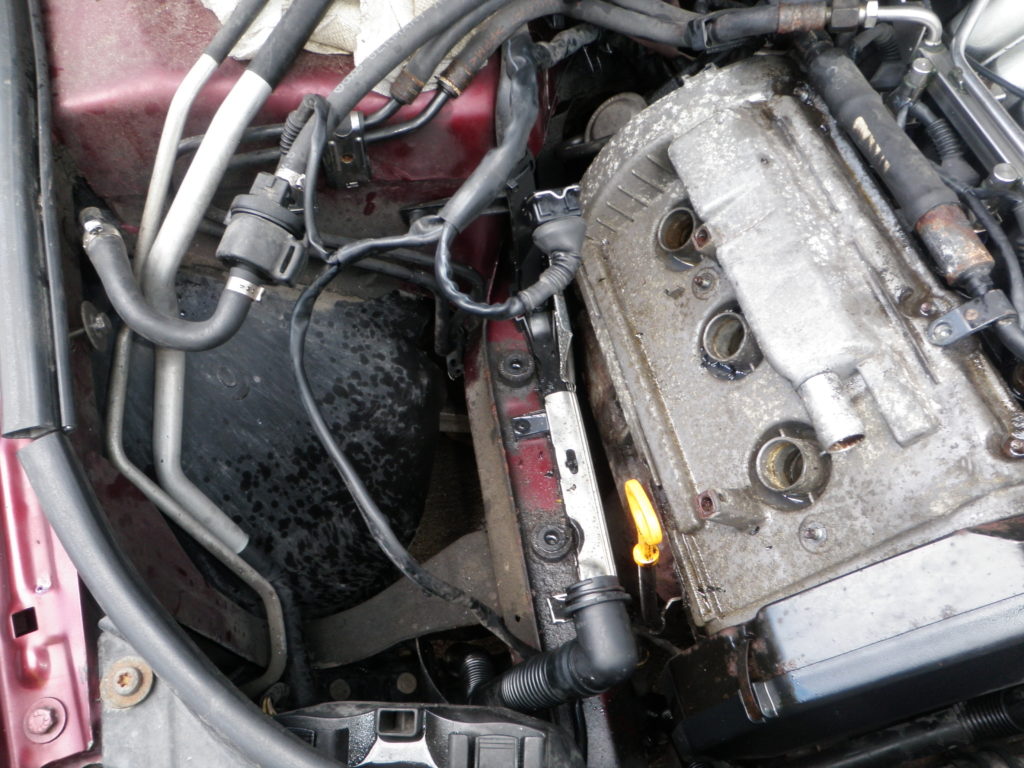
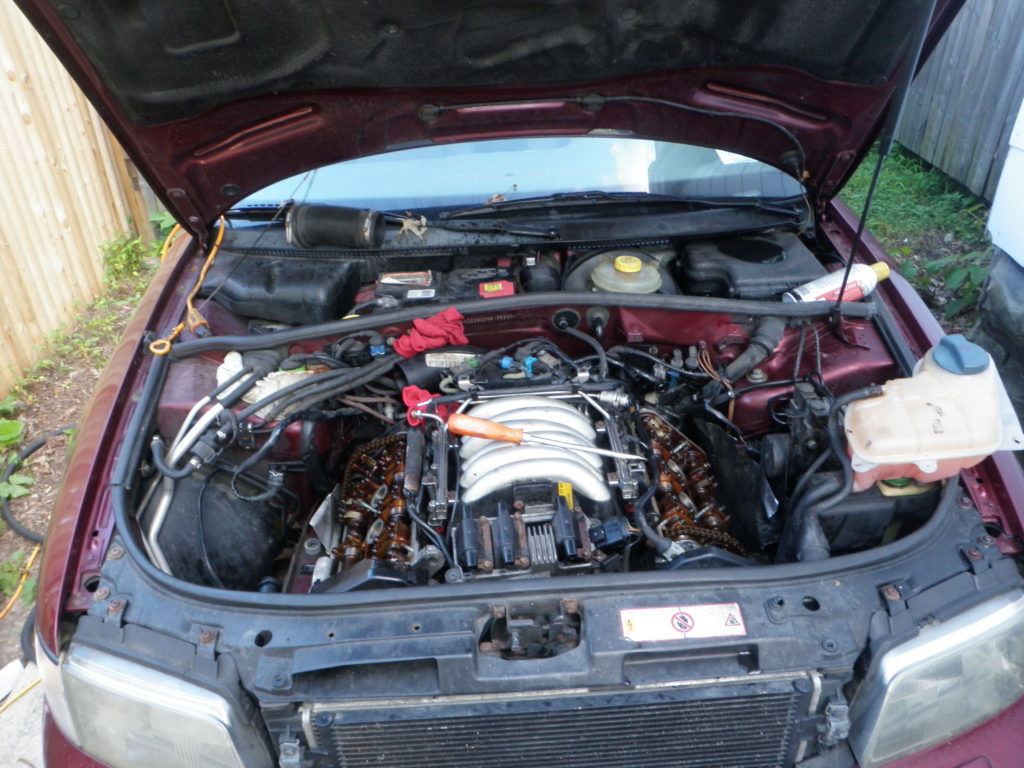
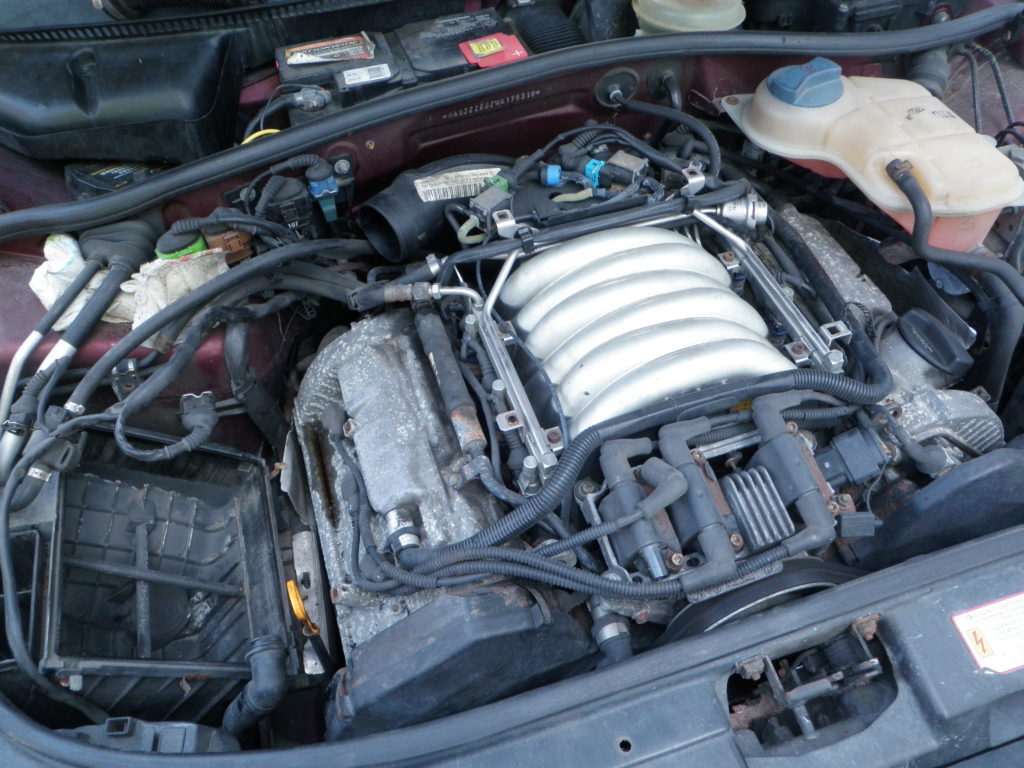
Here is how it looked after I had removed the air intake and air filter. I had not bothered to take a picture before I started any of the work, this was to help me put it back together if I needed it. You can see that spark plug #3’s wire is disconnected from the ignition coil.
Once the rest of the airbox and cables and hoses were removed,
I was ready to pull the right side valve cover.
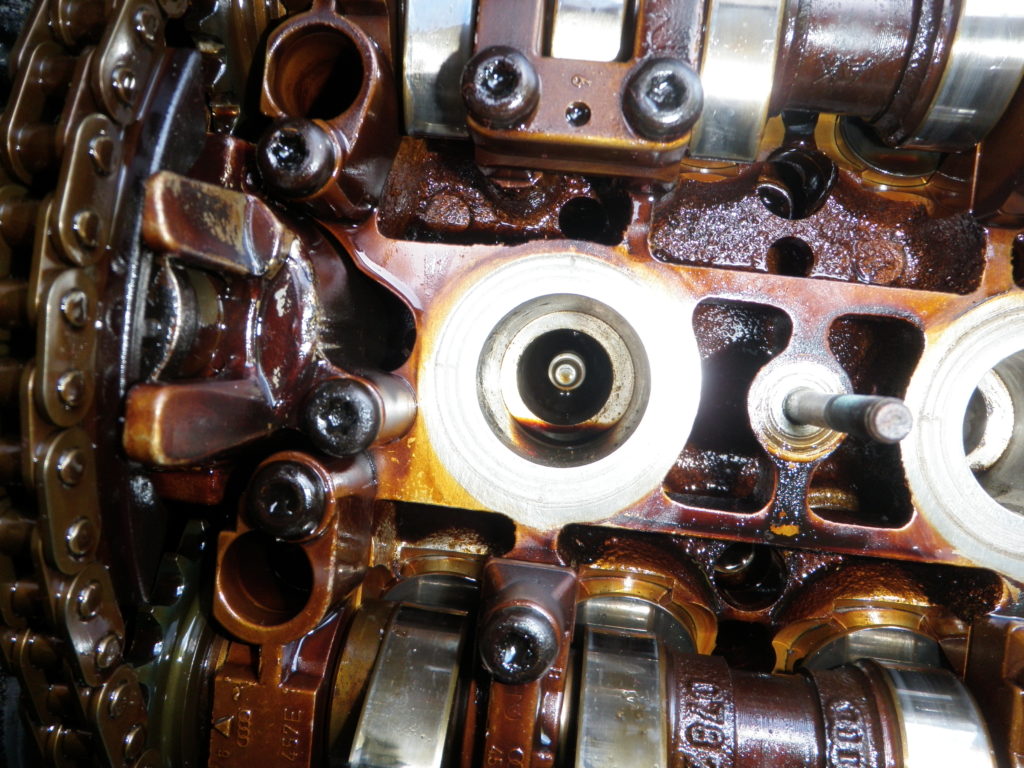
Looking down at cylinder #3 you can see:
1. the pool of oil at the bottom of the spark plug shaft in the middle
2. the 3 intake valve cam lobes at the top
3. the 2 exhaust valve cam lobes at the bottom
4. the chain drive that connects the two camshafts for this bank on the left
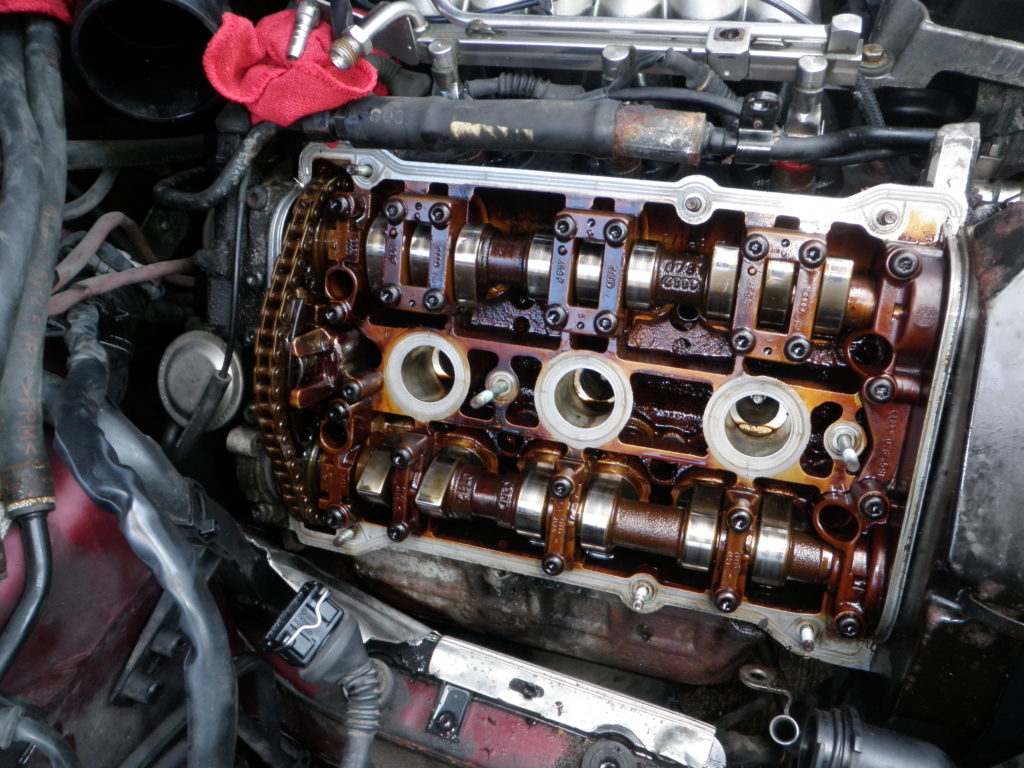
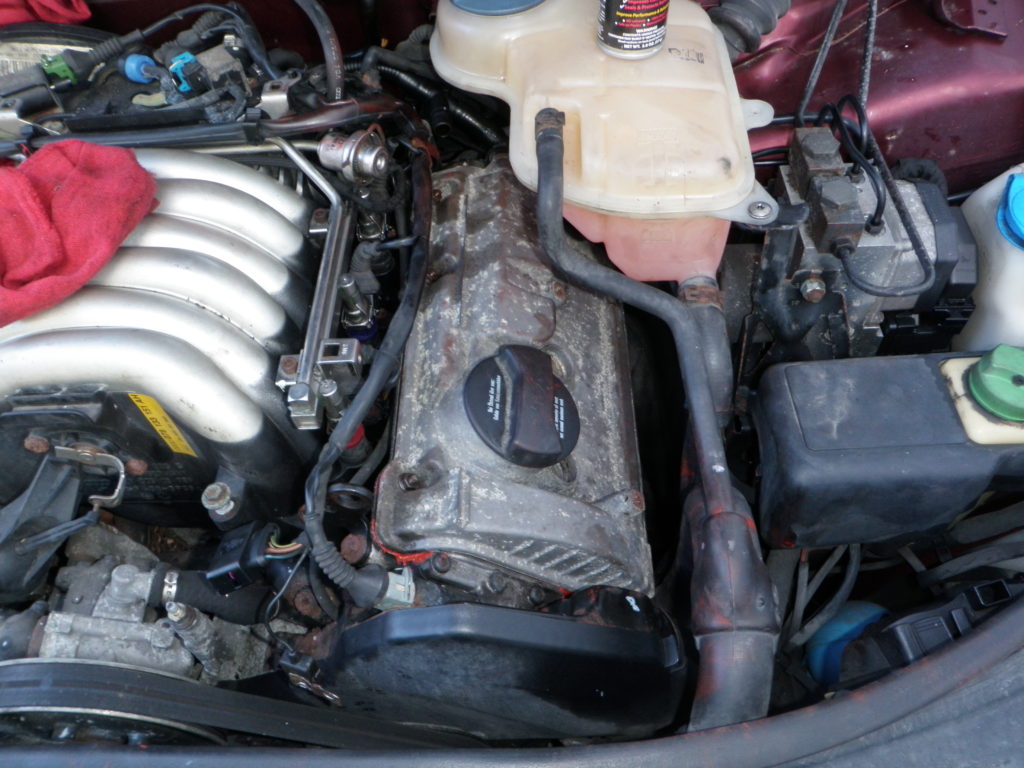
Here is the entire right hand side head as viewed from the top.
Note the two fuel lines disconnected at the top left, one is the high pressure supply and the other the return from the fuel pressure regulator. I could not get the valve cover past them without disconnecting them.
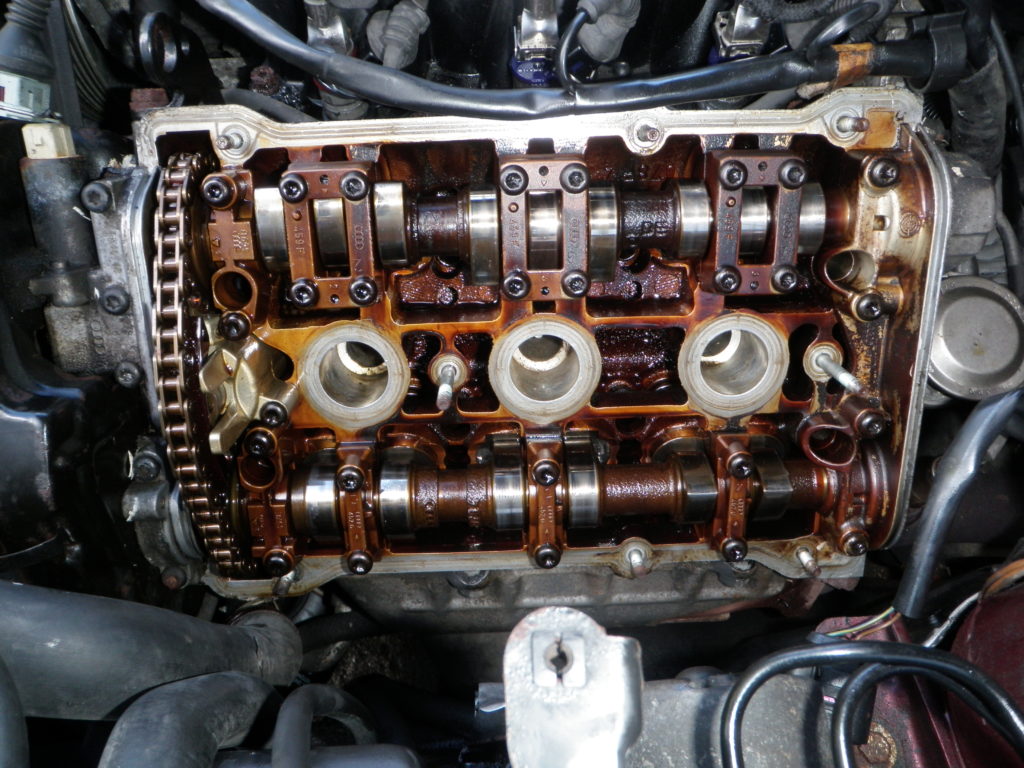
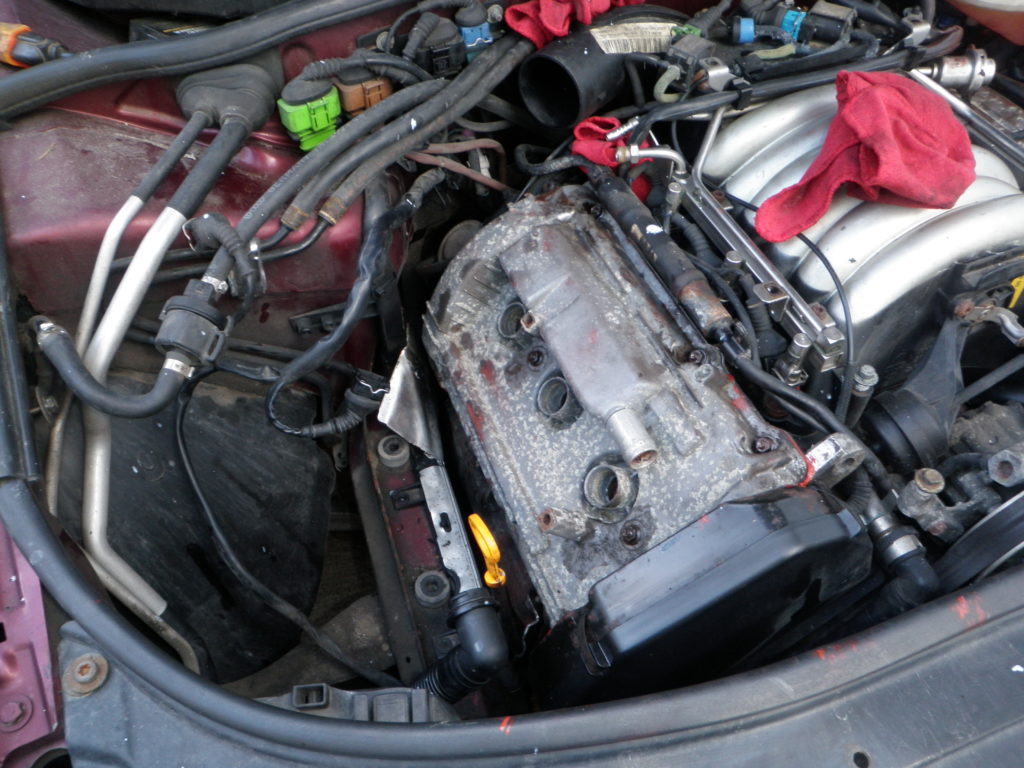
And here is the left hand side.
Both sides open to daylight. Note that the designation Left side and Right side are from the driver’s seat, so the RHS is on the left in this photo and the LHS is on the right.
To get the LHS off I had to move the coolant reservoir, there is enough play in the 20 year old hoses to just move it aside once the three screws and one electrical connector are un-done.
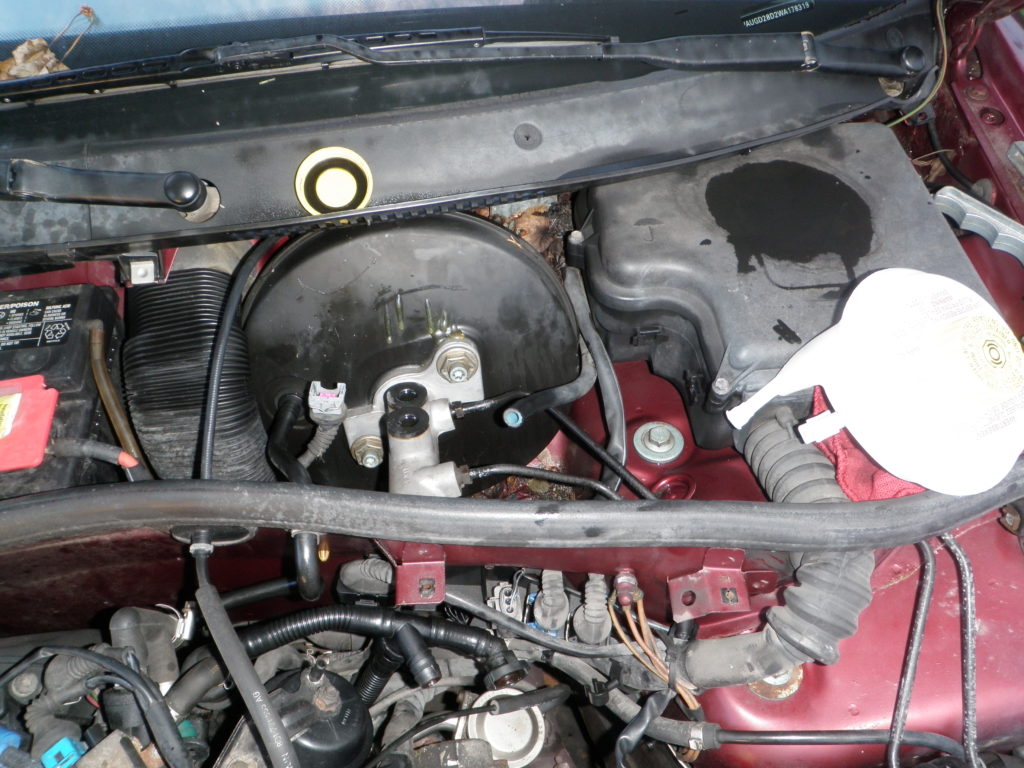
Where did the brake fluid reservoir go ?
The white blob to the right is the new one.
There are four connections to the reservoir:
1./2. two connections to the brake master cylinder, front/rear
3. the blue lined hose just right of center is the connection to the clutch master cylinder
4. an electrical connection for the brake fluid level float
(yes, the car tells you if you’r brake fluid level is low)
This reservoir of brake fluid is also the source of the
clutch fluid necessary for the hydraulic clutch.
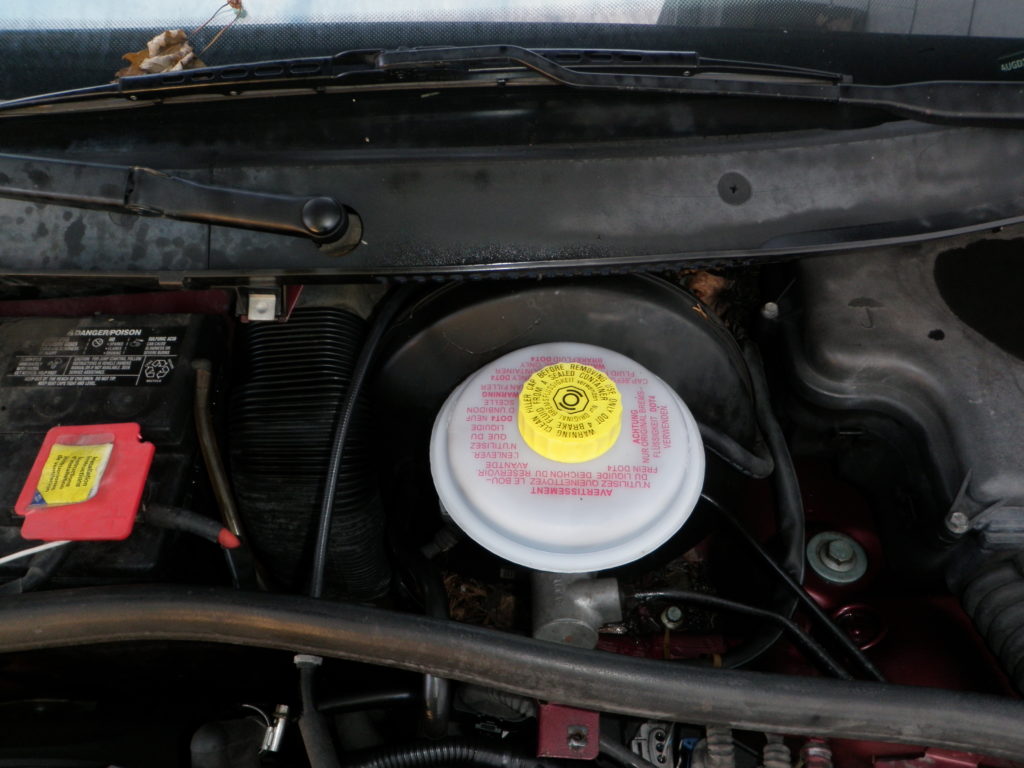
That is the new brake fluid reservoir installed. Since it is a “universal” part, good for manual or automatic transmission cars, I had to cut an opening at the end of the fitting for the clutch feed. Not a big deal, if you noticed before you installed it.
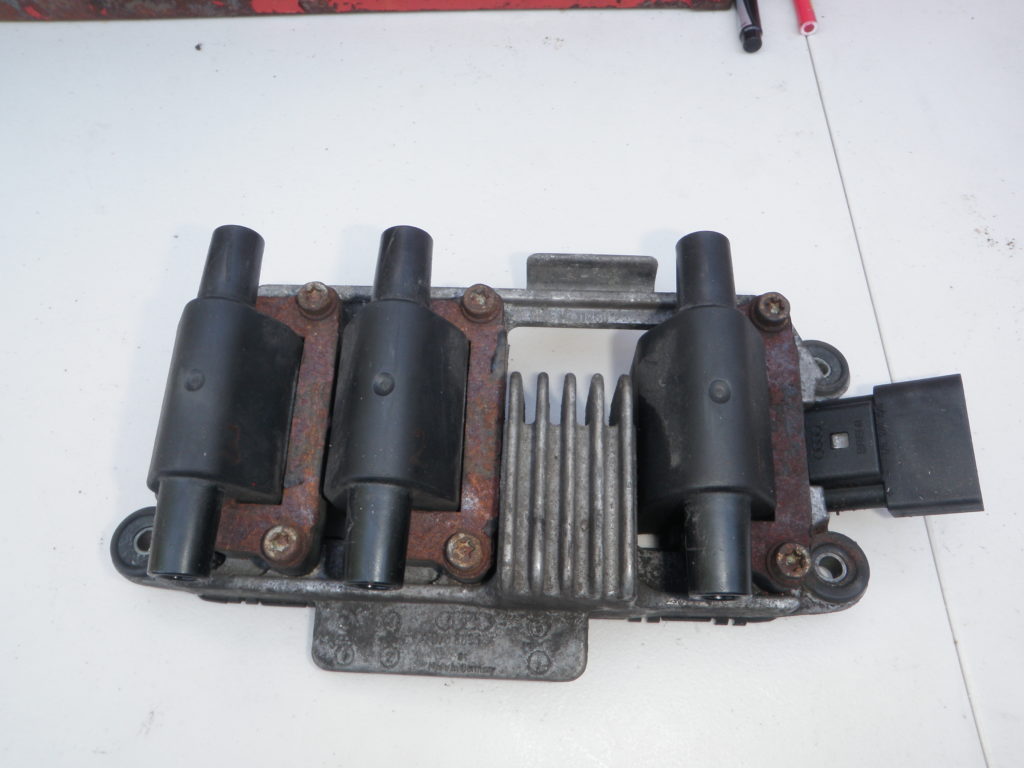
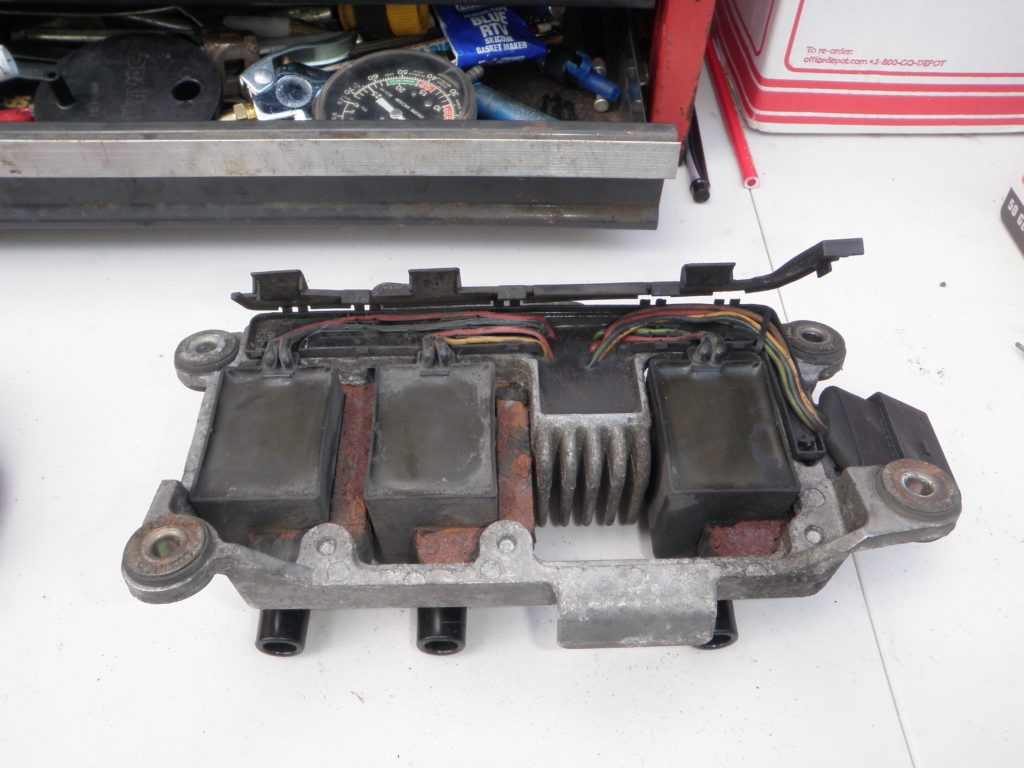
The other part of this project, the ignition coil module.
The black connector at the right is where power comes in and each of the three coils are signaled to fire. The silver brick with the fins is the electronics module that fires the coils. Each high voltage ignition coil, there are three of them, has two outputs. Unlike old school coil plus distributor, none of these coils have a ground connection on the output. The two outputs go to opposing spark plugs.
Getting technical here, each spark plug will fire twice for each pass through the 4-cycles of a modern engine. Both times at about top dead center, once when going from intake to compression stroke, and again at the “other end”, when going from exhaust stroke to intake stroke. A clever bit of efficiency if you do not need to tune each spark individually. Current ignition systems usually have one coil per spark plug to permit just such monitoring and tuning.
This is the bottom of the module. This is as close as you can get to the guts. Each coil is epoxy potted and the electronics module is encapsulated in what feels like rubber. Given that this example is still performing flawlessly after more than 20 years and 250,000 miles I’d say the assembly technique works well.
Having said that, I did not like the look of the rust on the iron laminations on the ignition soil cores, so I took to cleaning, priming, and painting it.
In this case, assembly really was the reverse of disassembly.
Everything went together very smoothly.
LHS valve cover replaced.
But I had to then remove the coolant reservoir again (thankfully it is only 3 screws and 1 electrical connector) to get at the spark plugs to replace them.
RHS valve cover back in place.
A side note about electrical connectors and connections.
Many mechanics and cars use grease to keep water away from electrical connections.
Keeping water away is good, but the grease does nothing to improve the electrical connectivity. Most, if not all, electrical connectors on Audi’s (and probably VW’s and Porsche’s as well as other German manufacturers) are designed to keep the water out. So I worry less about water and I do worry about the electrical contacts themselves.
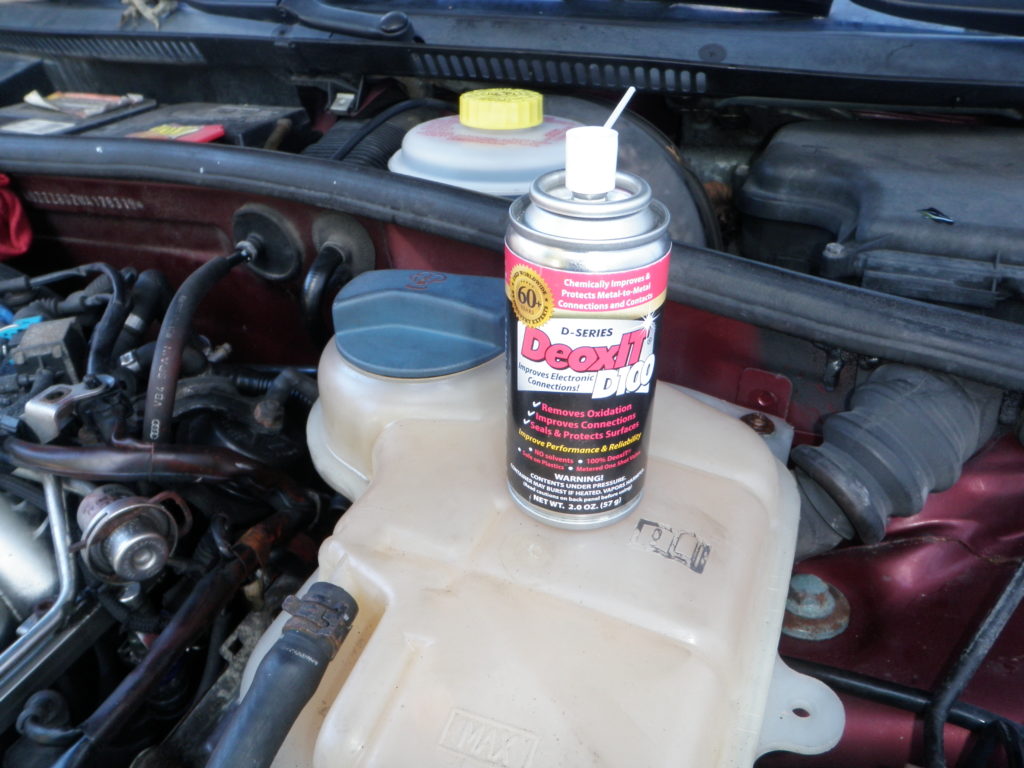
DeoxIT is a chemical that cleans and lubricates electrical contacts, leaving a film behind that improves conductivity. I use it on every electrical connector as I reassemble things.
I also use it on mic packs in theatre, but that is a different category of discussion.
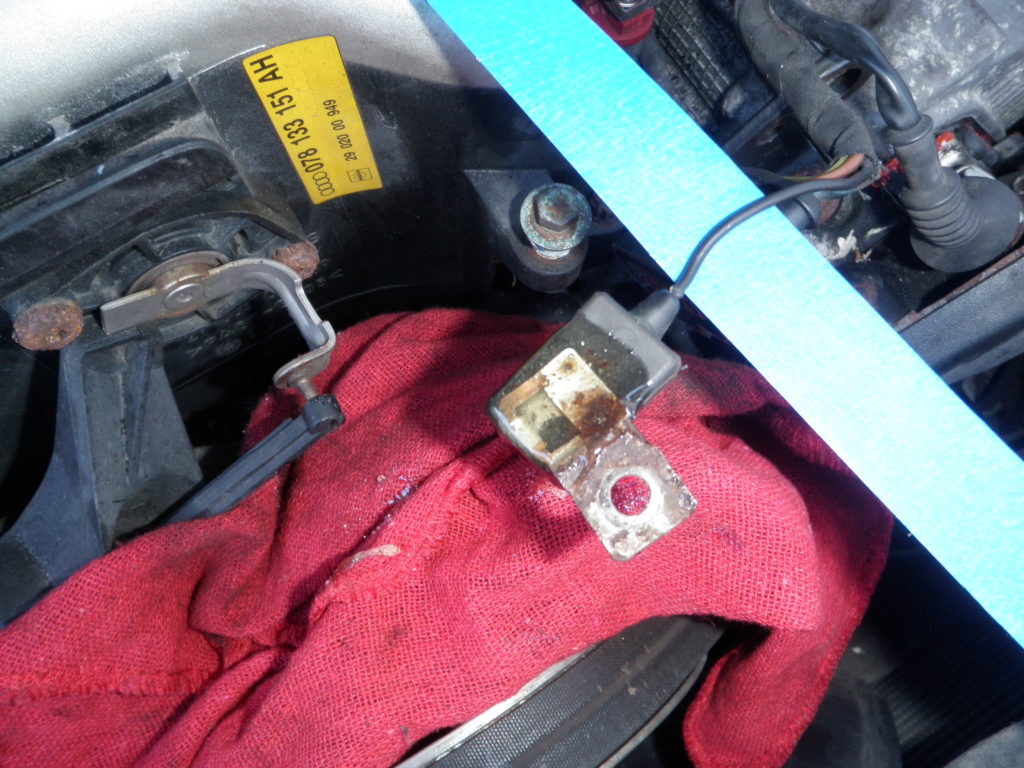
There was one casualty of the job. A small capacitor installed adjacent to the Ignition Coil Module was damaged while removing the Ignition Coil Module. A small blob of epoxy and it is back in service (note the shop towel to catch any drips as the epoxy sets).
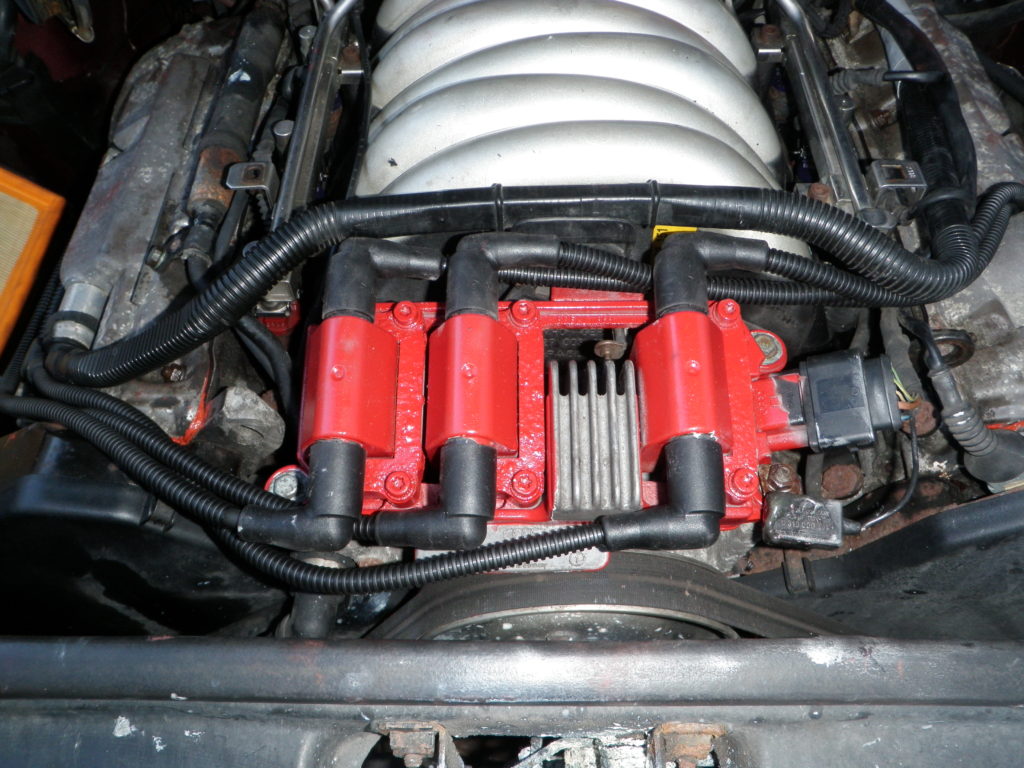
Here is the freshly cleaned, primed, and painted Ignition Coil Module reinstalled at the front of the engine with a brand new set of spark plug wires. Note the repaired capacitor at the lower right hand mounting bolt.
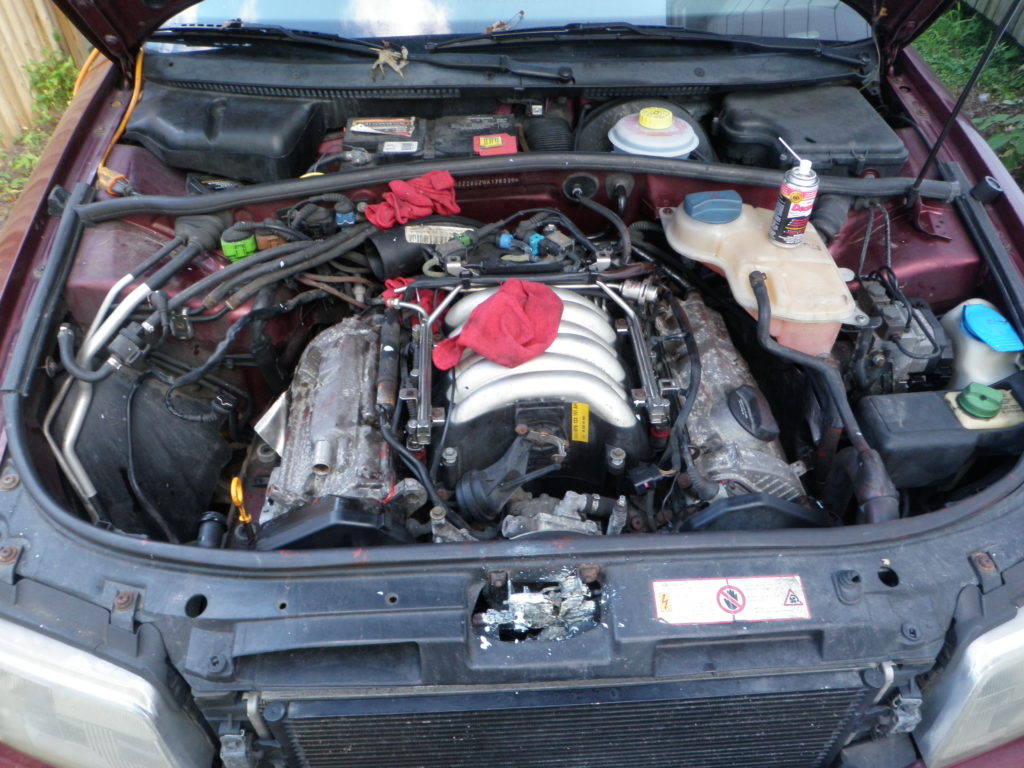
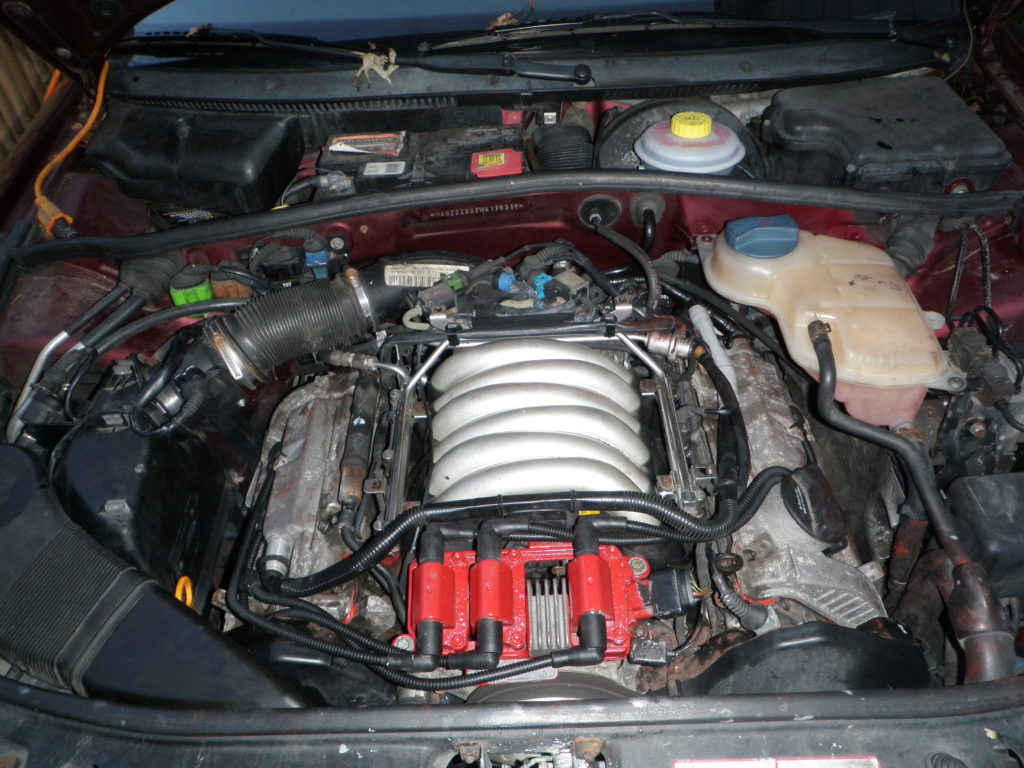
The whole thing put back together.
I do not generally use the plastic cosmetic trim covers, while they make the engine bay look cleaner, they serve no really useful purpose and just get in the way when you need to do something.

Replacing the rear springs and shocks was the first major automotive project I have done in years. This is the first major project under the hood of this car, even though I have owned it for well over 10 years and 100,000 miles. Up until now I did not have the luxury of working leisurely on this car, we needed it for our daily commutes, so any work went to the shop and we got a loaner. Having said that, there has been very little that needed to be done to the engine.

The next items are a mix of general maintenance and projects.

  • The air filter needs replacing
  • It is due for an oil change
  • I need to find a rubber surround for the subwoofer
  • The front suspension is calling me
  • Those brake lines are not going to replace themselves
  • But I will pay to have a professional replace the clutch, anybody know where I can get an affordable lightweight flywheel / clutch kit for a 1998 A4 (B5 chassis) 2.8L 30V 5-speed quattro Avant ?

Useful Tidbits

I am always in need of a certain command or utility and end up searching the Internet for a solution. I’ve gotten tired of it and am starting to collect useful commands and utilities here so that I can easily find them. Of course that means anyone else can find them as well.

macOS Wireless Network Roaming 

macOS wireless roaming for enterprise customers

Mac OS Show All Files (including dot files) in Finder

defaults write com.apple.finder AppleShowAllFiles YES
Tested on version: 10.12.5 Sierra
I found this at Ian’s Blog.

FreeBSD set system Timezone

There are a number of write ups on the Internet about making links to various system timezone control files, and while I like knowing what is going on under the covers, there is a much simpler way. The utility that is used at system installation time to set the timezone can be run at any time to set the system timezone, tzsetup.

2011 MacBook Pro Graphics Failure

My 2011 MacBook Pro has the dreaded discrete graphics failure. The best description of the failure (and the fix) is here. I now have two bootable partitions on that machine, one has the kernel extensions for the discrete graphics removed and I use it only to fix the NVRAM and main partition after doing an OS update. It is running High Sierra (10.13) latest and runs great except for the graphics, but I don’t use it for heavy graphics work anyway.  

Mac Recovery

How to create a bootable installer for macOS

How to reset SMC (System Management Controller

  • Laptop with non-removeable battery and without T2 chip: Left side Shift-Control-Option then press Power and hold for 10 seconds.

How to reset PRAM / NVRAM

  • Hold down Option-Command-P-R while turning on.

How to boot from USB drive

  • Apple Silicon Mac: Hold the power button while turning on to get the startup disk chooser.
  • Intel Mac: Hold down Option while turning on to get the startup disk chooser.

Network Stuff

A collection of Ubiquiti WAP links follows. I am a big fan of the Ubiquiti Wireless Access Points (WAP) and supporting Enterprise network systems.

Ubiquiti High Density WLAN Scenario Guide

Ubiquiti New BaseStationXG at a Concert Venue